Location
Mount Vernon, WA 98274
Location
Mount Vernon, WA 98274
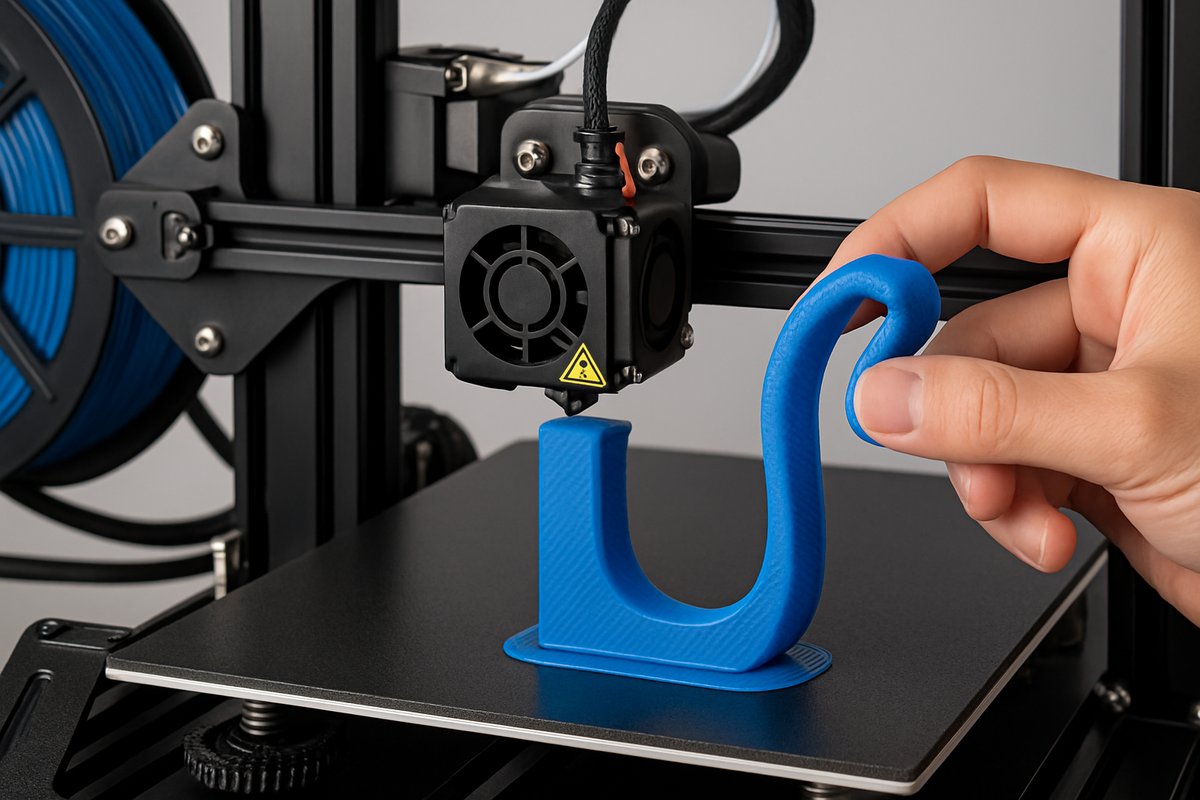
Flexible TPU filament opens the door to elastic prototypes, splash-proof designs, and impact-resistant parts. This guide reviews the keys to printing TPU on an FDM machine, from selecting the right flexible filament and build surface to upgrading hardware and fine-tuning slicer settings for reliable results. Read on to unlock the stretchable side of additive manufacturing.
In a world where additive manufacturing often focuses on rigid plastics, thermoplastic polyurethane (TPU) brings elasticity and toughness into the mix. TPU filament blends rubber-like flexibility with high abrasion resistance, letting makers craft phone cases that bend, seals that compress, and wearables that stretch. Yet printing flexible filament can challenge even seasoned hobbyists. From filament feed issues to poor layer adhesion, the path to perfect TPU prints has its twists. This guide breaks down every step-hardware upgrades, build surfaces, slicer tweaks, and post-print techniques-so you can confidently bring elastic designs to life.
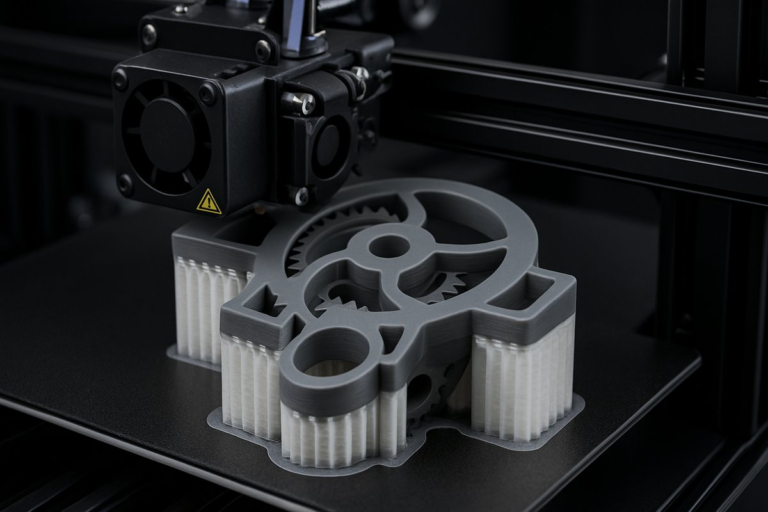
TPU is a subclass of thermoplastic elastomers that melts and flows like PLA or ABS but cools into a soft, springy solid. Its Shore hardness ranges from soft rubber bands to firm skateboard wheels, making it ideal for prototypes that must absorb shock, bend repeatedly, or seal against water. Medical models, drone bumpers, custom grips, and flexible hinges are just a few examples. But unlike rigid filaments, TPU resists being pushed through a hotend at high speed. It can buckle in a Bowden tube, tangle around a drive gear, or ooze between layers if settings aren’t tuned.
Common pitfalls include filament slipping, under-extrusion, stringy bridges, and poor bed adhesion. TPU’s high elasticity causes it to compress and flex in the feed path, leading to inconsistent extrusion. Retraction can pull the filament too far back or not far enough, causing clogs or oozing. Build surfaces that work for PLA might not grip flexible parts, resulting in warped or detached prints. Addressing these challenges requires a tailored approach to hardware and software.
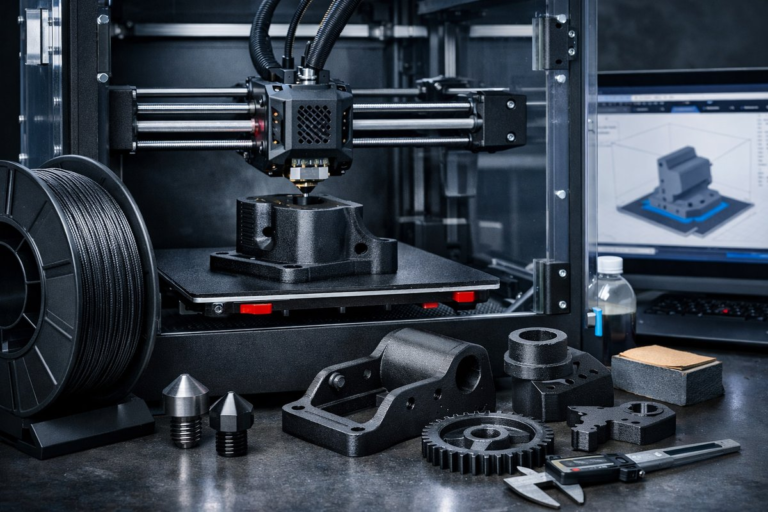
First, consider your printer’s extrusion system. Many stock FDM machines use a Bowden setup, where the extruder motor sits apart from the hotend and pushes filament through a long PTFE tube. This arrangement excels at fast, rigid filaments but can struggle with TPU’s bendy nature. A direct drive extruder-mounted directly on the hotend-minimizes the distance TPU travels under compression, reducing jams and improving responsiveness.
Installing a direct drive upgrade kit involves removing the Bowden feeder assembly and attaching a compact extruder carriage near the hotend. This swap typically includes a compact geared motor, a shorter PTFE coupling, and mounting brackets. By pressing TPU straight into the melt zone, a direct drive extruder decreases filament path length and prevents buckling. Many makers observe smoother extrusion, cleaner retractions, and higher print success rates once this upgrade is in place.
Next, optimize your build surface. TPU loves textured adhesion but demands easy release after cooling. A spring steel sheet with a textured PEI coating provides a fine compromise: strong first-layer grip paired with slight flex in the plate that helps parts pop off once the bed cools. Heat the bed to around 50 °C for the first few layers, then reduce or turn off bed heating to allow the plate and part to contract, making removal painless.
Choosing the right TPU filament spool is equally crucial. Look for filaments with a consistent diameter tolerance (±0.02 mm) and clear material data sheets listing Shore hardness and printing temperature ranges. Softer grades (around Shore 85A) flow more easily but can be stringier. Firmer variants (closer to Shore 95A) resist deformation in the extruder but require slightly higher nozzle temperatures. A mid-range TPU in the 90 A zone often offers a balanced blend of flow and rigidity for most projects.
In your slicing software, set layer height to about 25-50 percent of the nozzle diameter. For a 0.4 mm nozzle, that means 0.1-0.2 mm layers. Finer layers improve surface smoothness and reduce visible lines, but too thin can amplify under-extrusion. Adjust extrusion multiplier to around 1.05-1.10 to ensure solid infill and seamless outlines. Many slicers allow live extrusion tests so you can measure actual flow and dial in the perfect multiplier before launching a long print.
TPU demands slower print speeds. While PLA might cruise at 60-80 mm/s, flexible filament typically needs 20-30 mm/s for outlines, infill, and supports. Use a slightly faster travel speed (around 100 mm/s) to reduce stringing between non-print moves. Keep acceleration and jerk values moderate to prevent sudden pull-back of the filament, which can introduce gaps or blobs. Taming these dynamic settings leads to smoother extrusion and fewer surprises mid-print.
Retraction parameters make or break TPU prints. A standard Bowden retraction of 5-6 mm is too aggressive for flexible filament. With direct drive setups, limit retraction to 1-2 mm at speeds of 15-25 mm/s. Some slicers let you disable retraction entirely for flexible materials, relying instead on coasting or setting minimum travel distances before retracting. Experiment on a small calibration model-like a stringing test tower-to find the sweet spot where oozing and under-extrusion both stay in check.
Cooling fan settings also affect flexible prints. Too much airflow cools TPU layers before they bond, causing weaker interlayer adhesion. Set fan speed to 20-40 percent, or turn it off for the first few layers, then gradually ramp up to maintain print stability without compromising strength. If your printer has a duct shroud, ensure airflow targets bridging areas without blasting solid walls too aggressively.
Nailing the first layer makes all the difference. Level the bed carefully and set nozzle height for just enough squish-about the thickness of a sheet of paper. Slow down the first layer speed to around 10-15 mm/s, giving TPU time to nestle into the textured surface. A solid lead-in line or skirt helps you gauge adhesion before each print begins. Taping off corners and watching for curling or edge lifting lets you pause and adjust before the model grows too large.
When your design needs supports, choose flexible-friendly patterns. Tree supports reduce contact area, making them easier to remove without tearing. Lower support density (around 10-15 percent) and raise the interface layer height slightly for clean separation. If supports still cling, a thin layer of water-soluble glue stick or PVA solution can ease release without harming flexibility.
Environmental control can stabilize prints. TPU is less sensitive to drafts than ABS but benefits from a consistent ambient temperature. Enclosures-which capture heat from the heated bed-help maintain a uniform build chamber, reducing warping and layer inconsistencies. If an enclosed printer isn’t an option, shield the build area from fans or air conditioners that might chill freshly deposited layers.
After printing, remove parts gently. Flex them slightly to break the vacuum seal against the PEI sheet, then peel from one corner. Avoid metal spatulas that can scratch the surface; a plastic palette knife or dedicated scraper works best. Inspect layers for any gaps or delamination, and use a small deburring tool to remove wispy strings or support remnants without compromising the overall flex.
Calibration cubes, bridging towers, and retraction towers remain valuable for tuning TPU. Print a quick 20 mm cube to verify dimensional accuracy and interlayer bond strength. A bridge test across 30-40 mm gaps reveals if cooling or extrusion speed needs further adjustment. By documenting each change and comparing results, you build a reliable setup profile for future flexible projects.
With optimal settings in hand, explore applications that highlight TPU’s strengths. Design custom smartphone bumpers that compress on impact, bicycle handlebar grips molded to your hand, or wearable straps that conform to movement. Robotics hobbyists can print soft end-effectors, and engineers can prototype gaskets or seals before committing to costly molding processes. The ability to iterate without tooling overhead accelerates product development and fosters creativity.
Sustainability also factors in. Many TPU filaments are now certified for industrial composting or partially bio-based, reducing environmental impact. Flexible filament scraps can be ground and reincorporated into new prints, creating experimental materials blends. By choosing responsibly sourced TPU and minimizing failed prints through careful calibration, makers align with broader goals of waste reduction in manufacturing.
Once you’ve mastered single-material flexible prints, consider multi-material projects. Co-printing rigid PLA bases with TPU shock-absorbing overlays lets you craft hybrid parts that leverage the best of both worlds. Dual-extruder printers can deposit flexible bumpers on hard chassis frames in a single operation. These advanced workflows open doors to wearable electronics housings, custom orthotic insoles, and damping mounts for machinery.
Printing TPU challenges conventions of rigid additive manufacturing, but the rewards are well worth the effort. By upgrading to a direct drive extruder, choosing a textured PEI spring steel sheet, and dialing in slicer settings-speed, retraction, cooling-you’ll achieve clean, elastic parts that stand up to real-world use. Flexible filament transforms 3D printing into a medium of motion and resilience, bending the boundaries of what’s possible. Plug in the filament, hit print, and watch your designs come to life with newfound stretch and strength.