Location
Mount Vernon, WA 98274
Location
Mount Vernon, WA 98274

Discover a step-by-step guide to harnessing carbon fiber reinforced nylon filament on your FDM printer. Learn about essential upgrades like hardened steel nozzles and enclosures, optimized slicer settings, and post-processing techniques to achieve durable, dimensionally accurate parts for functional prototypes and end-use applications.
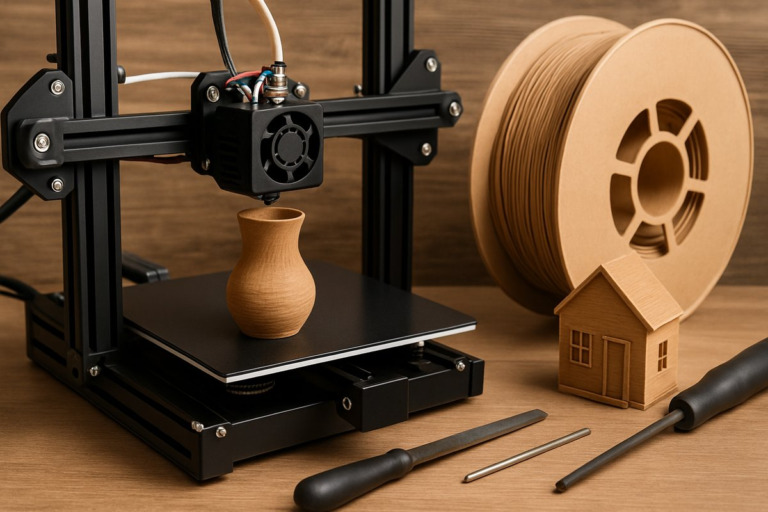
Additive manufacturing has transformed how we conceive and fabricate functional components, bridging the gap between digital design and real-world performance. Among desktop processes, fused deposition modeling (FDM) remains a versatile entry point for makers, engineers, and small workshops. But to push beyond PLA and ABS into truly high-performance territory, composite filaments come into play. Carbon fiber reinforced nylon blends the toughness and flexibility of nylon with the stiffness and thermal stability of carbon fiber, yielding parts that can withstand mechanical stresses and elevated temperatures. This guide reviews the entire workflow-from hardware preparation to post-processing-so you can confidently print and apply carbon fiber nylon parts in robotics, drone frames, jigs, tooling, and more.
Why Carbon Fiber Reinforced Nylon?
At its core, nylon (polyamide) offers excellent impact resistance, fatigue strength, and chemical tolerance. However, standard nylon can suffer from warping, moisture absorption, and dimensional variability. By infusing short carbon fibers, manufacturers achieve a filament that resists heat deformation, shows reduced shrinkage, and gains rigidity. Parts printed with carbon fiber nylon exhibit higher tensile modulus and lower coefficient of thermal expansion compared to plain nylon. That means you can design thin-walled, load-bearing structures without adding bulk, making it ideal for drone arms, mechanical brackets, robotic linkages, and functional prototypes that mimic final-production behavior.
Gathering Essential Components
To get the most from carbon fiber nylon, certain printer upgrades and materials are strongly recommended:
• Carbon Fiber Reinforced Nylon Filament: Choose a high-quality spool rated for FDM. Look for well-controlled fiber lengths to ensure smooth extrusion and consistent layer adhesion. A diameter tolerance of ±0.03 mm helps maintain uniform flow.
• Hardened Steel Nozzle: Carbon fibers are abrasive and will erode brass nozzles quickly, leading to under-extrusion and poor surface finish. Install a hardened steel or ruby-tipped nozzle in 0.4 mm or 0.6 mm diameter to balance fine detail and flow rate.
• Heated Build Plate: Nylon demands higher bed temperatures (typically 80 - 100 °C) to minimize warping and ensure first-layer adhesion. A glass plate with a nylon-friendly adhesive or a textured build surface works best.
• Enclosure or Draft Shield: Maintaining an ambient temperature around the part reduces layer cooling differentials. A simple acrylic enclosure or fabric draft guard helps prevent warping and delamination in taller prints.
• Drying Station or Filament Dryer: Nylon is hygroscopic, meaning it absorbs moisture from the air. Use a filament dryer or desiccated storage box to pre-dry the filament at 60 °C for 4 - 6 hours to avoid steam bubbles, stringing, and compromised mechanical properties.
Preparing Your Printer
First, perform a thorough inspection and calibration of your FDM machine. Clean and level the bed, then verify the Z-offset to get a perfect first layer. Replace your stock brass nozzle with the hardened steel upgrade, ensuring it’s tightened properly but not over-torqued. Confirm that your extruder’s drive gear grips the filament securely; consider upgrading to a geared extrusion system for higher torque if your stock feeder struggles with the thicker filament.
Filament Conditioning
Store your filament spool in a sealed container with desiccant packets when not in use. Before printing, place the spool in a filament dryer set to 60 °C for at least four hours. If you don’t have a dedicated dryer, an oven with precise temperature control can suffice-just monitor closely to prevent overheating.
Slicer Settings Overview
While slicer settings will vary by machine and filament brand, these starting points generally yield reliable results:
• Extruder Temperature: 250 - 270 °C. Begin at the lower end and increase in 5 °C increments if layers fail to bond.
• Bed Temperature: 80 - 100 °C. A higher bed temp combats warping but can lead to ooze; balance accordingly.
• Print Speed: 30 - 50 mm/s. Slower speeds improve interlayer adhesion and reduce the risk of filament slipping through the hot zone.
• Layer Height: 0.15 - 0.25 mm. Thicker layers enhance mechanical strength and shorten print time.
• Infill Density and Pattern: 20 - 40 percent grid, gyroid, or triangular infill offers a good balance of strength and material usage.
• Cooling Fan: Off or set to minimal (10 percent) after the first few layers. Nylon benefits from slow cooling to prevent shrinkage stresses.
• Retraction: 1 - 3 mm; 20 - 40 mm/s. Short, slow retractions help reduce stringing with hygroscopic nylon.
Step-by-Step Printing Workflow
1. Level and Clean the Build Plate: Ensure no residual adhesive or filament is present. Wipe with isopropyl alcohol if switching from other materials.
2. Preheat the Nozzle and Bed: Allow the system to reach the target temperatures. Check that the nozzle channel is clear.
3. Load and Prime Filament: Insert the dried filament, feed until you see uniform extrusion at the nozzle tip, and purge any color or moisture remnants.
4. Print a Calibration Cube: Use a simple 20 mm cube to validate dimensions, squareness, and surface finish. Measure with calipers and adjust Z-offset or e-steps if needed.
5. Tune First Layer: Aim for a slight squish without the nozzle digging into the bed. A well-set first layer prevents lifting and curling at corners.
6. Monitor Initial Layers: For the first 5 - 10 layers, watch for signs of warping, under-extrusion, or stringing. Pause the print to adjust settings or apply more bed adhesive if required.
7. Resume and Inspect: Once confident, let the printer complete the job. After cooling, gently remove the part-avoid flexing it while hot, as nylon is more pliable when warm.
Post-Processing and Finishing Tips
Carbon fiber nylon prints often emerge with a matte, slightly textured surface. Here are methods to refine your parts:
• Light Sanding: Use fine grit (220 - 400) wet/dry sandpaper to smooth layer lines. Be cautious around small features.
• Annealing: Place parts in an oven at 80 - 90 °C for 1 - 2 hours to relieve internal stresses, improving toughness and dimensional stability.
• Chemical Smoothing: Unlike ABS, nylon resists most solvents. A brief dip in hot water can round sharp edges but won’t dissolve layer lines.
• Coating: Epoxy spray or brush-on coatings can seal the porous nylon surface for a sleek finish and add a moisture barrier.
Troubleshooting Common Challenges
• Warping at Corners: Increase bed temperature or add a brim. Check enclosure temperature and avoid drafts.
• Brittleness or Layer Delamination: Confirm the filament was fully dried. Raise nozzle temperature by 5 °C or reduce fan speed.
• Nozzle Clogs: Perform a cold pull using nylon filament at 140 - 160 °C. Inspect the nozzle for fiber buildup and replace when necessary.
• Poor Adhesion to Build Plate: Apply a nylon-compatible adhesive such as PVA glue stick or specialized bed sheets designed for nylon.
• Surface Roughness: Verify extrusion multiplier and flow rate. Over-extrusion leads to bulging; under-extrusion produces gaps and weak layers.
Unlocking Design Possibilities
With carbon fiber reinforced nylon dialed in, you can push your creativity beyond ordinary prototypes. Design custom drone frames that remain rigid under vibration, build end-use brackets for automotive and robotics applications, or craft lightweight jigs and fixtures for machining operations. The combination of nylon’s impact resistance and carbon fiber’s stiffness opens doors to applications once reserved for industrial processes. Moreover, given its chemical resistance, you can use printed components in corrosive environments like marine or chemical processing setups.
Sustainability and Recycling
Nylon can be recycled via grinding and re-extrusion, although the composite nature complicates the process. For sustainable practices, consider printing support structures with biodegradable PLA or water-soluble PVA to minimize waste. When discarding failed prints, check with local recycling programs for options on composite materials or explore specialized services that handle engineering plastics.
Ready to Try It Yourself?
Carbon fiber reinforced nylon opens a new frontier in desktop additive manufacturing, elevating prototypes and functional parts to near-industrial performance. By upgrading your hardware, dialing in slicer settings, and adopting good filament-drying habits, you’ll achieve strong, accurate prints that withstand real-world demands. Gather your components, follow this modular workflow, and let your next project showcase the power of composite FDM printing.
Curiosity is the spark that drives innovation. Embrace the learning process, iterate on your designs, and share your successes with the maker community. The world of high-performance 3D printing awaits-layer by layer, your ideas can become reality.