Location
Mount Vernon, WA 98274
Location
Mount Vernon, WA 98274
Dive into the world of stereolithography (SLA) resin printing with this detailed how-to guide. Learn essential setup tips, material choices, and post-processing best practices to transform digital models into high-fidelity parts using off-the-shelf tools and components.
Additive manufacturing has unlocked a realm of creative and functional possibilities by building objects layer by layer from digital designs. Among the most precise and versatile techniques in this space is stereolithography, or SLA resin printing. Far beyond the desktop FDM machines that extrude filaments, SLA uses a UV light source to cure liquid resin into solid form, delivering exceptional surface finish, intricate detail, and engineering-grade performance. In this guide, you’ll get hands-on with every stage of an SLA project: choosing the right printer and resin, dialing in your slicing settings, managing safety and cleanup, and optimizing post-cure procedures-all with practical tips that you can replicate in your own workspace.
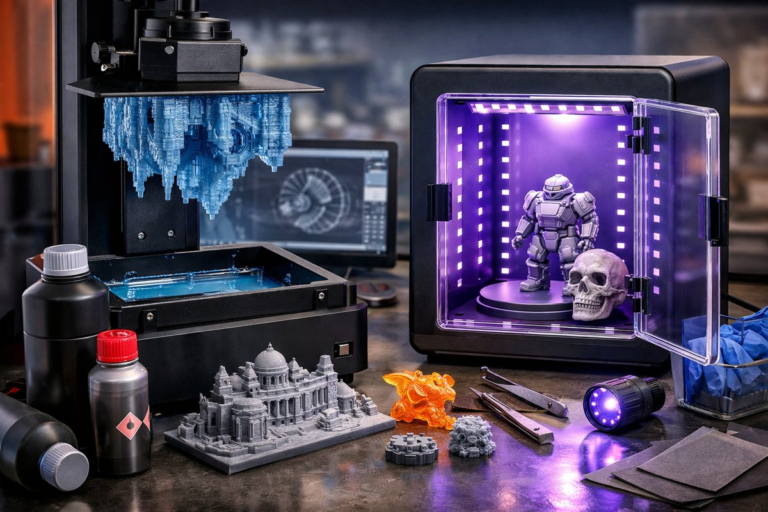
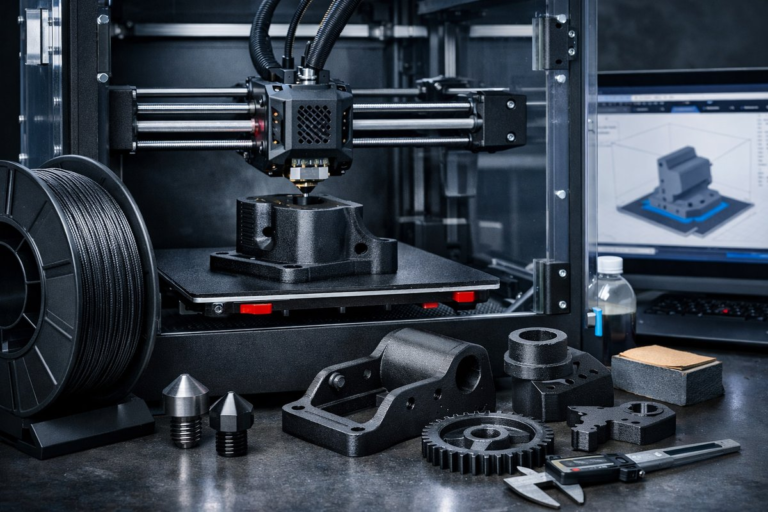
Begin with printer selection. SLA printers come in a range of build volumes and resolutions. For hobbyists and small-scale prototyping, a compact desktop SLA unit with a 120-150 mm build height provides a balance between foot-print and capability. Key specifications to compare include pixel size (which determines XY resolution), layer thickness range, and the light source type (LCD versus laser). A monochrome LCD light engine speeds up print times and extends screen lifetime, though it may cost slightly more. Whichever model you pick, ensure its ecosystem supports third-party resins and replacement parts to keep your options open.
Once the printer is in place, focus on resin selection. Standard grey or clear resins are ideal for beginners because they offer predictable performance, good detail, and forgiving adhesion. Engineering-grade resins, like tough or flexible variants, let you explore end-use prototyping for functional parts, but they can require different exposure settings and more careful post-cure handling. When reviewing resins, look at viscosity (thicker resins may need preheating), mechanical property data (tensile strength, elongation), and color opacity (opaque pigments can reduce cure depth and require longer exposures). Always shake or stir resin thoroughly before pouring to ensure pigment and additive uniformity.
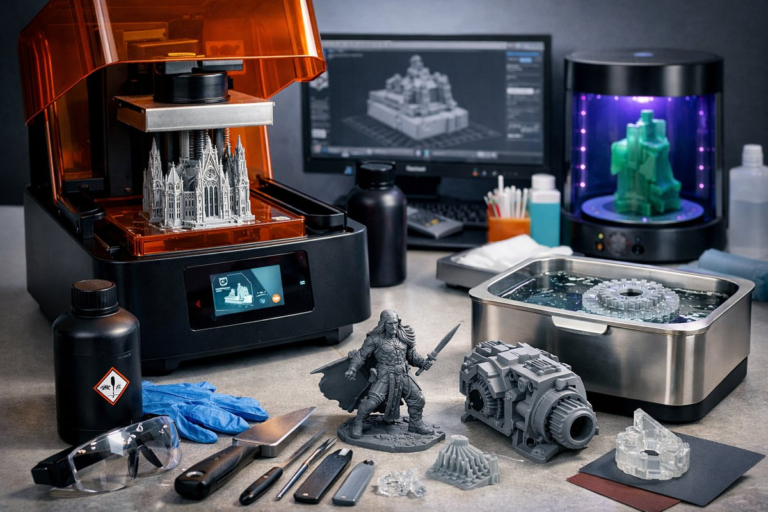
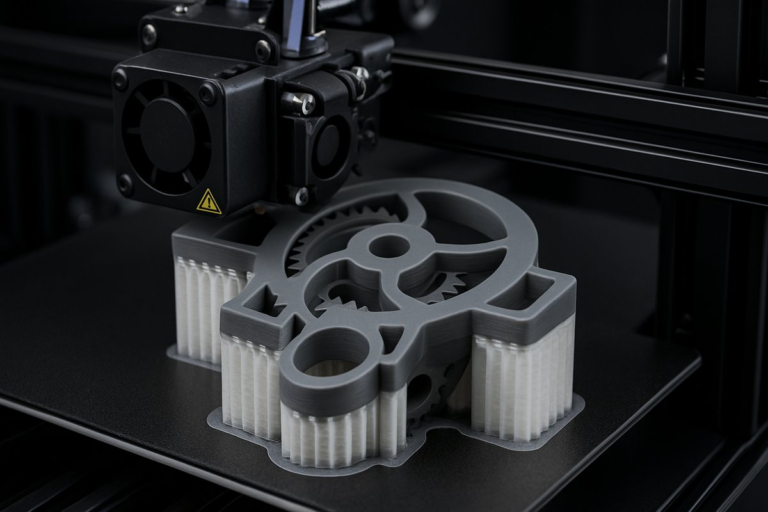
Preparation of your digital model is equally critical. Start with an optimized 3D file exported as an STL or 3MF. In your slicing software, orient parts to minimize overhangs and support density. SLA supports tend to be more delicate than FDM scaffolding, so place supports at low-stress points to avoid blemishes on visible surfaces. Experiment with automated support algorithms, then fine-tune individual touchpoint size and density. A typical layer thickness for fine detail is 25-50 microns, but larger layers up to 100 microns can speed up prints when resolution is less critical.
Slicing settings hinge on the resin’s recommended exposure times. For a standard grey resin, base layer exposures often run 30-45 seconds to ensure strong adhesion to the build plate, while subsequent layers cure in 5-8 seconds each. If you notice layer separation or sticking to the vat film, tweak your bottom exposure or lift speeds: faster lifts help peel the cured layer off the FEP film, but too rapid can introduce peel stress and cracks. Every printer-resin combo behaves slightly differently, so keep a simple test model on hand-a hollow cylinder or small calibration tower-to iterate through exposure and lift parameters before committing to a full build.
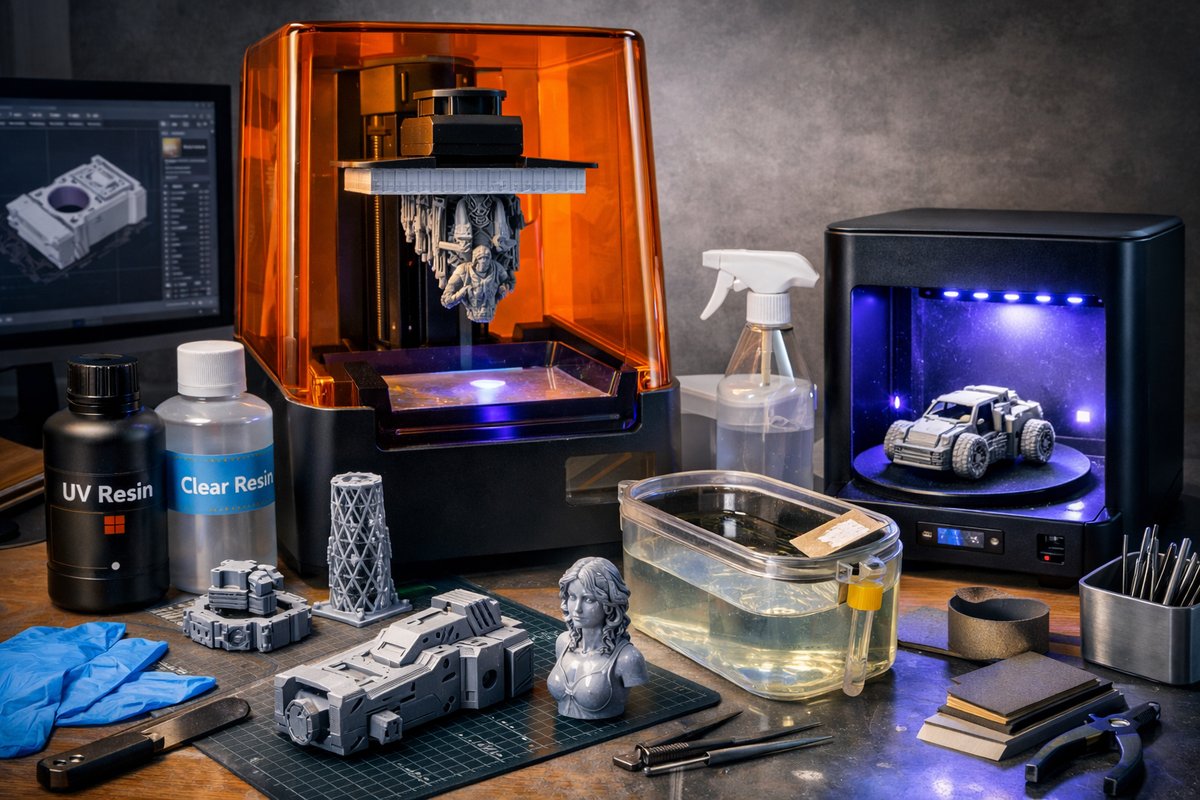
Safety and workspace organization are nonnegotiable. Liquid resin is photoreactive and can cause skin irritation. Always wear nitrile gloves and safety glasses rated for chemical splash. Work on a tray or in a dedicated resin-safe area to contain spills. Have absorbent paper towels or lint-free wipes ready for quick cleanup, and keep a supply of isopropyl alcohol (IPA) at 90% or higher for washing parts. Ideally, set up a ventilated curing and washing station in a well-ventilated room or under a fume-extracting hood.
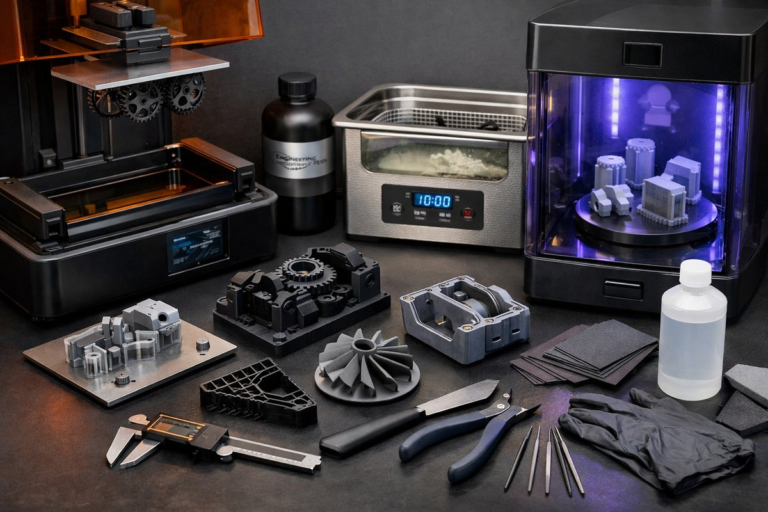
After printing, the post-processing workflow determines the quality and mechanical properties of your final part. Remove the build platform, drain uncured resin back into its bottle through a fine mesh filter to catch debris, and gently tap off excess resin. Submerge the part in an IPA wash station or a pair of nested jars: first with fresh IPA to remove bulk resin, then in a second IPA bath for a final rinse. A small soft brush or foam swab helps dislodge resin trapped in cavities. Once rinsed, let parts air-dry on a clean paper towel, ensuring no IPA pools in recesses.
Curing is the final step to reach full resin properties. A dedicated UV curing station equipped with adjustable timers and a turntable yields uniform exposure and consistent results. Place parts on the turntable, set the timer for the resin manufacturer’s recommended duration-often 2-5 minutes per side-and run a complete cycle. For engineering or tough resins, you may need longer cures or repeated cycles. Checking tensile and flexural performance on a test coupon can help you dial in precise cure times for critical applications.
Quality inspection and finishing elevate your prints from prototypes to polished deliverables. Inspect layer lines, support scars, and voids under good lighting. A digital caliper verifies dimensional accuracy if you need tight tolerances. Remove supports with flush cutters and file any residual marks with a fine-grit sanding block. For surface smoothing, a light spray of primer can fill micro-pits before painting or plating. If your project demands watertightness, consider applying a thin coat of epoxy or sealing varnish.
Troubleshooting is part of the learning curve. If layers delaminate, check for warped FEP film, incorrect exposure times, or a loose build-plate calibration. Curled corners often signal that bottom exposure is too long or the build-platform tilt is off. Adhesion failure can also mean your build plate needs re-leveling or cleaning with isopropyl alcohol and a gentle scouring pad. Keep a maintenance log for changes in film replacements, resin batches, or software updates to track how each variable influences results.
Beyond single-part prints, SLA resin techniques shine when producing small assemblies, dental models, or jewelry masters. The crisp surface detail and dimensional precision let you cast silicone molds directly from prints or integrate printed components into larger mechanical systems. Advanced users even tinted clear resins with post-cure dyes for translucent parts or blended multiple resins in a single vat for gradient effects. By mastering the core workflow-printer setup, resin choice, slicing, washing, curing, and finishing-you build not only parts but also transferable expertise for any material, printer, or scale.
At its heart, SLA resin printing is about translating digital imagination into physical form with fidelity and speed. With the right combination of printer, resin, and post-process tools, you can prototype functional gear, craft artistic sculptures, or produce production-ready parts that were once impossible without complex molds and machining. The steps you practice today are the foundation for tomorrow’s innovations in medical modeling, custom electronics housings, architectural prototypes, and beyond. Get ready to refine your workflow, experiment with new resins, and push the boundaries of what a desktop additive system can achieve.