Location
Mount Vernon, WA 98274
Location
Mount Vernon, WA 98274
Explore the transformative power of metal-filled filaments in FDM 3D printing. This guide walks you through selecting the right filament and hardware, optimizing your print settings, and mastering post-processing techniques to achieve lifelike bronze, copper, or steel finishes at home.
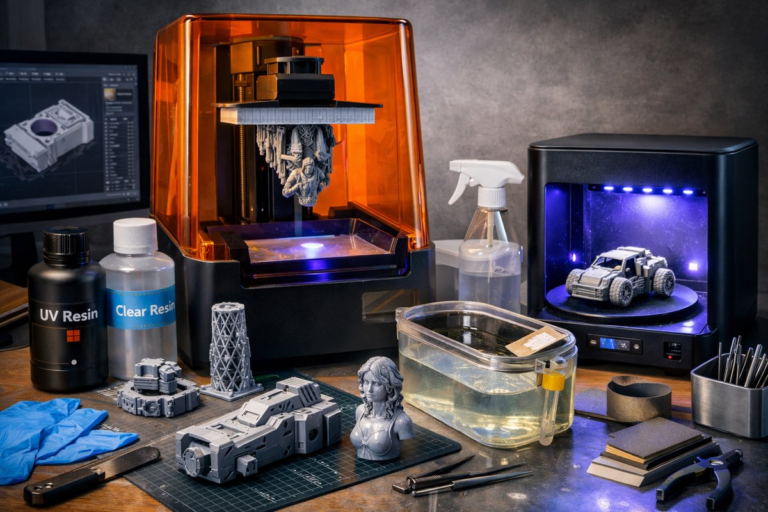
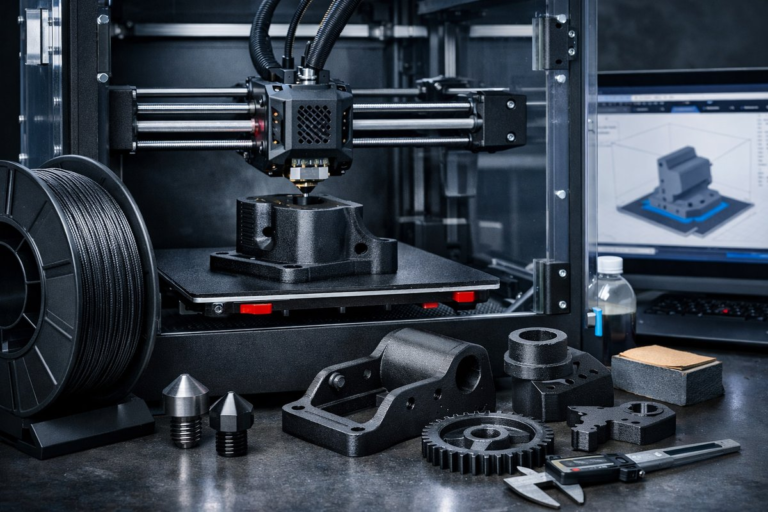
From ornate tabletop figurines to functional gears with a metallic sheen, metal-filled filaments open a new frontier in desktop FDM printing. Unlike process-intensive metal sintering or industrial binder jetting, metal-infused PLA, PETG, or nylon blends let hobbyists and designers produce convincing metal replicas with common printers. Yet these filaments demand specific hardware, fine-tuned slicer settings, and dedicated post-print polishing to reveal their hidden luster. In this comprehensive how-to, we’ll review the core technique and equip you with practical tips on hardware, software, and finishing tools that make metal-filled printing both accessible and awe-inspiring.
Understanding Metal-Filled Filaments
Metal-filled filaments combine a polymer base (often PLA) with microscopic metal powders-bronze, copper, stainless steel, or iron. At typical FDM temperatures (180-220 °C), the plastic carrier melts and extrudes normally while embedded metal particles settle layer by layer. Once printed, an item feels noticeably heavier and takes on a matte metallic hue. With sanding and polishing, the metal content begins to shine, mimicking cast or machined parts.
Unlike PLA alone, these composites are abrasive. Metal powders wear down standard brass nozzles rapidly, leading to inconsistent extrusion. To avoid clogging and maintain dimensional accuracy, a hardened steel or stainless steel nozzle is essential. Bed adhesion can also be tricky: metal-filled objects tend to warp less than pure ABS but may adhere too strongly to glass plates without a release agent.
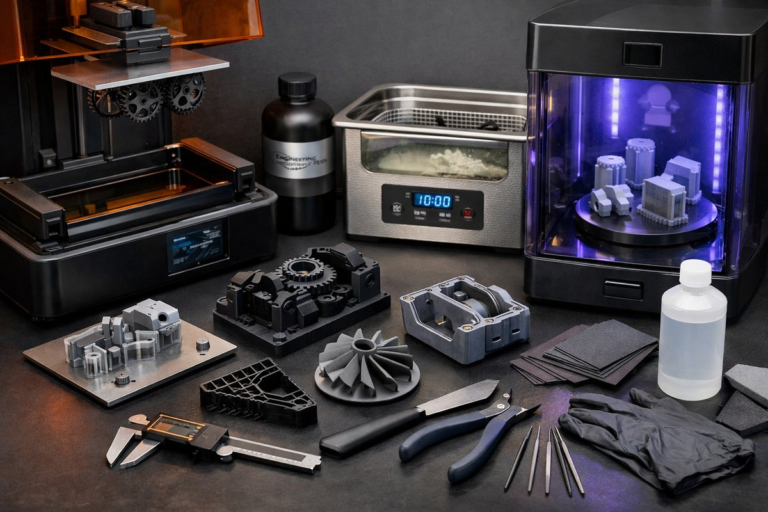
Required Tools and Components
• Metal-Filled Filament Spool (bronze, copper, or steel-infused PLA)
• Hardened Steel Nozzle (0.4 mm recommended for detail)
• FDM 3D Printer (heated bed, all-metal hotend capable of 220 °C)
• Build Plate Adhesive (glue stick or specialized print surface)
• Digital Calipers (for precise nozzle and layer calibration)
• Sandpaper Set (from 220 to 2000 grit)
• Micro-Mesh Polishing Kit (foam pads with polishing compounds)
• Nitrile or Heat-Resistant Gloves (for handling hot parts and chemicals)
• Clear Protective Lacquer or Wax (to seal the finish)
Step 1: Installing and Calibrating the Hardened Nozzle
Before loading metal-filled filament, switch out any brass or plated nozzles for a hardened steel version. Power down the printer, heat the hotend to extrusion temperature for your base plastic (around 200 °C), and safely loosen the old nozzle with a wrench. Screw in the hardened steel nozzle by hand, then tighten to manufacturer torque specifications-usually snug plus a quarter-turn at temperature. Tightening cold can damage threads or create small gaps.
After installation, recalibrate your extruder steps (E-steps) with digital calipers. Extrude 100 mm of filament and measure the actual fed length. Adjust the firmware or slicer multiplier so the hobb gear feeds the correct amount. This ensures your metal-filled prints match real-world dimensions.
Step 2: Configuring Slicer Settings for Metal-Filled Filament
Most slicers allow custom profiles. Start with a PLA template and tweak:
• Nozzle Temperature: 200-210 °C
• Bed Temperature: 50-60 °C
• Print Speed: 30-40 mm/s (slower speeds improve layer adhesion)
• Layer Height: 0.12-0.2 mm (thinner layers reveal more metal detail)
• Retraction Distance: 1-2 mm at 25-35 mm/s
• Cooling Fan: 30-50%
• Infill: 20-30% (higher infill adds weight and rigidity for post-processing)
Enable a skirt or brim to prime the nozzle and stabilize corners. If you see under-extrusion, increase flow rate by 2-5% to compensate for the filament’s higher density. Watch the first few layers to confirm smooth, continuous beads.
Step 3: Optimizing Bed Adhesion and Warping Control
Metal-filled prints cling firmly to bare glass; too much adhesion can damage parts. Apply a thin, even layer of glue stick or a removable print surface like PEI sheet. Avoid hairspray or tapes that leave residue. A slight brim (3-5 mm) helps anchor corners without excessive grip across the entire part.
Monitor the first layer for squish. Aim for a flattened semicircle in cross-section: enough to bond, but not so much that it’s hard to pry off when cool. If edges lift, reduce cooling to 20% or increase bed temperature by 5 °C.
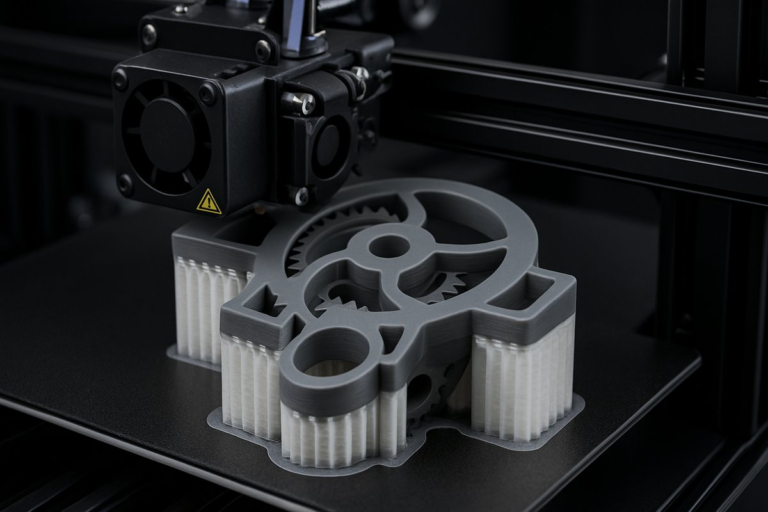
Step 4: Printing the Part
Once settings are dialed in and adhesion set, start the print. Remain nearby for the first 10-15 minutes, checking that nozzle height, extrusion, and bed adhesion remain consistent. Metal infill adds mass, so vibration dampeners or a sturdy frame can reduce ghosting artifacts. If you notice small layer shifts, lower acceleration and jerk limits in your firmware.
Step 5: Removing Supports and Initial Cleanup
Allow the print to fully cool to room temperature. Gently remove the brim with a scraper or flush cutters. If you used supports, break them away carefully; metal-filled parts can chip under too much force. Use a pair of needle-nose pliers for fine details.
Visual inspection reveals a muted, matte finish. Don’t panic-this is normal. The next steps unleash the hidden metallic properties.
Step 6: Sanding and Smoothing
Progress through sandpaper grits:
1. 220 grit to remove layer lines and major blobs
2. 400 grit to smooth flat surfaces
3. 800 grit for minor scratches
4. 1200 or 2000 grit to refine the surface before polishing
Lightly wet-sand flat faces and curves, using water as a lubricant. Keep pressure even and avoid over-sanding thin features. The exposed metal particles will begin to gleam subtly through the plastic binder.
Step 7: Polishing to Reveal the Shine
With the part clean and dry, move to a micro-mesh polishing kit. These foam pads are impregnated with polishing compounds:
• Stage 1 (bronze or brown compound): Cuts through microscratches
• Stage 2 (white compound): Improves mid-range gloss
• Stage 3 (green compound): Final high luster
Wrap the micro-mesh pad around the part or use a rotary tool with a felt buffing attachment at low speed (under 3,000 RPM). Wear gloves to protect your skin from metal dust. In each stage, polish until the surface gleams, wiping away residue with a soft cloth.
Step 8: Sealing and Protection
Bare metal particles can tarnish or oxidize over time. To preserve the finish, apply a thin coat of clear lacquer or wax polish. Spray lacquer in light passes, holding the nozzle 20 cm away. Allow 15-30 minutes between coats, with two to three layers for durability. Alternatively, rub on a microcrystalline wax and buff to a satin glow.
Troubleshooting Common Issues
• Nozzle Clogs: If flow stops, retract filament, heat to maximum safe temperature (220 °C), and manually push filament to clear the head. Clean the nozzle with needle wires or a cold-pull technique.
• Uneven Shine: Inconsistent sanding or patchy polishing can leave dull areas. Return to 800 grit sandpaper to even out scratches before re-polishing.
• Surface Pitting: Air trapped in filament or under-extrusion causes small holes. Increase flow by 3-5% and slow down print speed.
Advanced Tips for Enthusiasts
• Multi-Material Blends: Combine metal-filled filament with translucent PLA for inlays or layered color effects. Use dual-extrusion printers to swap between materials mid-print.
• Functional Strength: For load-bearing parts, consider metal-filled nylon or PETG blends. They require higher temperatures but offer increased toughness and chemical resistance.
• Artistic Effects: After polishing, experiment with patinas-apply mild vinegar or citric acid to bring out antique finishes on bronze filaments.
• Sustainability: Collect failed prints and leftover filament scraps. Grind them into chips and mix as infill for non-critical prototypes, reducing waste.
Why Try Metal-Filled Printing?
Beyond the aesthetic reward, metal-infused filaments help bridge the gap between concept and reality. Designers can evaluate heft, balance, and surface finish before investing in costly metal machining or sintering. Educators can demonstrate principles of material science and post-processing in classrooms. And makers can produce limited-run decorative items-pendants, coins, or trophies-with a professional look, all from a desktop rig.
By combining the right hardware (hardened nozzles and reliable printers), disciplined slicer settings, and patient post-processing, any curious enthusiast can transform polymer layers into gleaming metallic artifacts. The process embodies the core spirit of additive manufacturing: iteration, personalization, and creative problem-solving. So load that bronze PLA, tighten your nozzle, and start printing-and let each polished layer bring your ideas to life.
Leave your fear of complex industrial machines behind. With a few specialized components and a healthy dose of curiosity, you’ll be crafting convincing metal replicas that challenge perceptions of what a desktop 3D printer can achieve. Embrace the process, refine your technique, and share your metallic masterpieces with a community hungry for innovation.
You’ve got the guide-now it’s time to press play on your printer. Happy making!