Location
Mount Vernon, WA 98274

Location
Mount Vernon, WA 98274
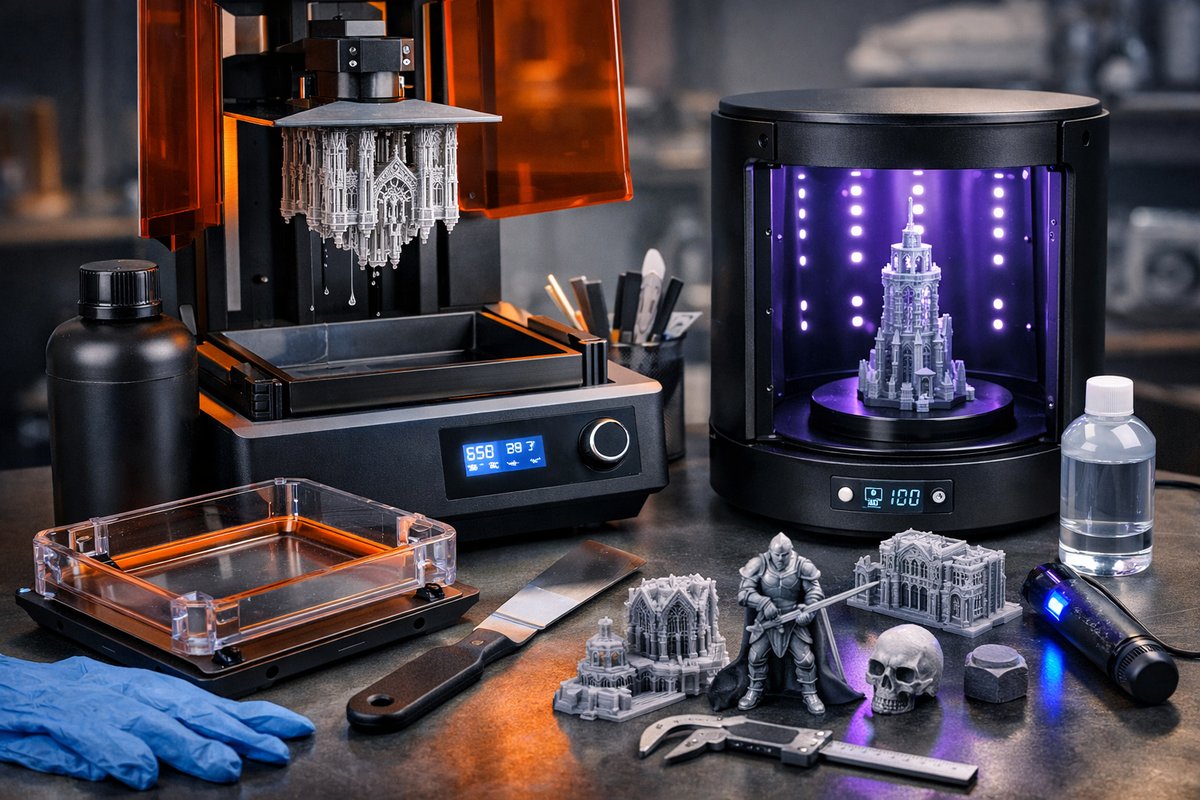
Dive into the world of desktop stereolithography (SLA) with an in-depth guide that unpacks each stage of resin-based 3D printing, from initial setup to final cure. Discover the essential tools and components-resin vats, FEP films, UV curing stations-and learn best practices for achieving razor-sharp detail and consistent results.
Additive manufacturing through stereolithography (SLA) unlocks the potential for extraordinarily fine features, smooth surface textures, and complex geometries that are challenging for filament-based systems. Instead of extruding melted plastic, SLA selectively cures a liquid photopolymer layer by layer using a precise UV light source. This guide covers the core components and step-by-step workflow to help you embark on your first resin-printing project-and refine your technique for repeatable, high-quality outcomes.
Getting started with SLA requires understanding both the hardware and consumables that define print performance. At its heart, a desktop SLA printer consists of a build platform suspended above a transparent resin vat, a UV light engine or laser beneath that vat, and an adjustable rail system for stable, incremental Z-axis movement. While the basic architecture is similar across many models, the quality of key parts-like the resin vat’s FEP release film, the stiffness of the build plate, and the resolution of the UV light source-will directly impact print fidelity and reliability.
Before powering on the printer, assemble a toolkit of essential accessories. A fresh FEP film replacement kit for the resin vat ensures even curing and clean part release. A digital caliper helps verify layer thickness calibration and dimensional accuracy. A set of nitrile gloves and safety goggles protects skin and eyes during handling of uncured resin and isopropyl alcohol baths. A UV curing station with adjustable exposure times accelerates post-print hardening, while a funnel and filter mesh help reclaim uncured resin back into its bottle after printing.
Preparation begins at the digital stage. Select or create an STL file designed for SLA’s strengths-thin-walled models, intricate lattice structures, and ornamental details. Import the file into slicing software tailored for your printer. Set a fine layer height-50 to 100 microns-to achieve crisp edges, and adjust exposure times according to resin manufacturer guidelines. Most standard photopolymer resins cure at 405 nm wavelength, so verify that your printer’s UV source matches. Apply support structures sparingly, targeting overhangs beyond 45 degrees and delicate antennae features, to minimize post-processing cleanup.
Level the build platform carefully before each print. A perfectly flat and parallel platform-to-film gap is critical; even slight tilts can lead to uneven layers or print failures. With the vat empty, loosen the platform screws and lower it until it gently contacts the FEP film. Tighten the screws in a star pattern to distribute pressure evenly. Some printers automate this leveling process with built-in sensors, but manual checks with a sheet of paper can confirm uniform clearance.
Pour just enough resin into the vat to cover the film surface without exceeding the recommended fill line. Introducing fresh resin reduces the chance of air bubbles or contaminants that can compromise first-layer adhesion. If you’ve used the resin before, swirl the vat gently to homogenize pigment particles and minimize streaking in printed parts. Avoid vigorous shaking, which introduces tiny bubbles that scatter UV light and create spotty cure zones.
Initiate the print and monitor the first layers closely. Proper adhesion is the foundation of a successful SLA part; if the initial layers peel or warp, pause the job immediately. Adjust the first-layer exposure time upward in small increments-typically plus 5 to 10 seconds per layer-until the model adheres firmly. Keep the printer enclosure closed to maintain a stable temperature and block ambient light, both of which can affect curing consistency.
Once the print completes, slowly raise the build platform to drain excess resin back into the vat. Use a soft silicone scraper to free the part from the platform, taking care not to flex or twist delicate features. Transfer the wet print to an isopropyl alcohol bath, ideally in a sealed container, to wash away uncured resin. Agitate gently or use a small soft-bristled brush to remove residual film from crevices. For best results, complete two sequential rinses with fresh alcohol.
After washing, place the part on a drying rack or paper towel to evaporate residual solvent. The drying stage is crucial to prevent moisture pockets that can interfere with final curing. Once dry to the touch, move the part into a UV curing station. Typical exposure protocols range from two to five minutes per side at 405 nm, but thicker sections may need longer. Rotate the part halfway through to ensure even hardening. Fully cured parts achieve optimal mechanical strength, dimensional stability, and biocompatibility when using certified resins.
Key components elevate SLA printing from a hobby experiment to a reliable manufacturing method. High-quality photopolymer resins engineered for low viscosity and rapid cure reduce layer separation and improve surface finish. Premium FEP films with uniform thickness resist punctures and adhesive buildup, extending vat life and lowering maintenance. A digital caliper ensures that the virtual model dimensions translate accurately in the physical print, allowing you to design press-fit assemblies or interlocking parts with confidence.
Troubleshooting common issues is part of mastering the craft. Layer lines that appear rough or inconsistent often trace back to vibration or misalignment in the Z-axis rail-tighten all guide rods and replace worn linear bearings. Cloudy surfaces usually indicate incomplete resin wash or overexposure to ambient UV light; verify wash timings and keep the printing area shielded. If prints detach mid-job, revisit platform leveling, first-layer exposure, and support density-often a minor tweak in any one area resolves adhesion hiccups.
For advanced users seeking hybrid workflows, consider integrating subtractive steps post-cure. A benchtop CNC mill or precision router can trim off support marks, machine mating surfaces flat, or engrave serial numbers. Tack the cured part onto a sacrificial MDF spoilboard with a thin double-sided adhesive, then use a small-diameter end mill to refine critical dimensions. This complementary approach blends the creative freedom of SLA with the precise finish of subtractive machining.
Regular maintenance keeps SLA printers performing at peak levels. Clean the resin vat thoroughly after every project, inspecting the FEP for scratches or clouding. Wipe down the build platform to remove cured resin flakes. Replace the vat film and resin filters on a schedule driven by usage-roughly every 20 to 30 print hours. Calibrate the UV light intensity periodically with a photometer to detect output degradation over time.
Resin printing invites experimentation. Swap out different resin formulations-tough, flexible, castable-and push the boundaries of SLA for your specific application, whether that’s jewelry prototypes, dental models, functional enclosures, or finely detailed figurines. Embrace the iterative cycle of digital design, print, analyze, and refine. Each run teaches you more about the interplay of exposure times, layer heights, and support geometries, accelerating your path to flawless micro-detail creations.
The quiet hum of the resin pump, the soft click of the Z-axis stepping motor, and the gentle glow of the UV light are hallmarks of a process that marries chemistry, mechanics, and digital design. By mastering desktop SLA, you tap into a subtractive machinist’s reverence for precision-except here, the form emerges through cured droplets instead of carved chips. Armed with the right components, tools, and workflow, you’re ready to reveal complex shapes and elevated textures that only resin printing can offer.
Whether you’re prototyping mechanical parts with fine interlocks or bringing intricate artistic visions to life, desktop SLA printing opens a world of high-resolution possibilities. Equip yourself with quality materials, follow the best practices outlined here, and embrace a cycle of continuous improvement. Soon, you’ll discover that the true reward lies not only in the finished part, but in the patient refinement that elevates each layer into a work of precision craftsmanship.












