Location
Mount Vernon, WA 98274
Location
Mount Vernon, WA 98274

Unlock the precision of modern CNC milling by exploring adaptive clearing techniques and the critical role of carbide end mills and high-performance router bits. This guide walks you through material prep, CAM strategies, tool selection, and finishing tips to transform raw blocks of wood or metal into detailed, purposeful designs.
Every object that emerges from a block of wood, metal, or plastic owes its shape to a series of deliberate, subtractive choices. In this guide, you’ll learn how to harness adaptive clearing-a dynamic machining strategy-to remove material efficiently and prepare your piece for fine finishing. Along the way, we’ll highlight the tools and components that make each pass safer, faster, and more precise, from carbide end mills to high-torque tool holders and spoil-board fixtures.
Starting with a Digital Blueprint
Before your machine ever engages the stock, clarity in your design is paramount. Begin by sketching or importing a CAD model that reflects your final vision. Pay attention to key features such as pockets, contours, fillets, and edges. For complex organic shapes in wood or metal, a ballnose end mill pathway will handle curves smoothly. In contrast, flat-bottom pockets and straight walls call for square end mills with fewer flutes for better chip evacuation.
Choosing the Right Stock Material
Select a block of hardwood (like oak or maple) when the final aesthetic values natural grain. For functional metal parts, 6061 aluminum offers an excellent strength-to-weight ratio and responds well to high-speed milling. If plastic components are your goal-say an enclosure-the right choice might be UHMW or polycarbonate, each requiring slightly different spindle speeds and feeds.
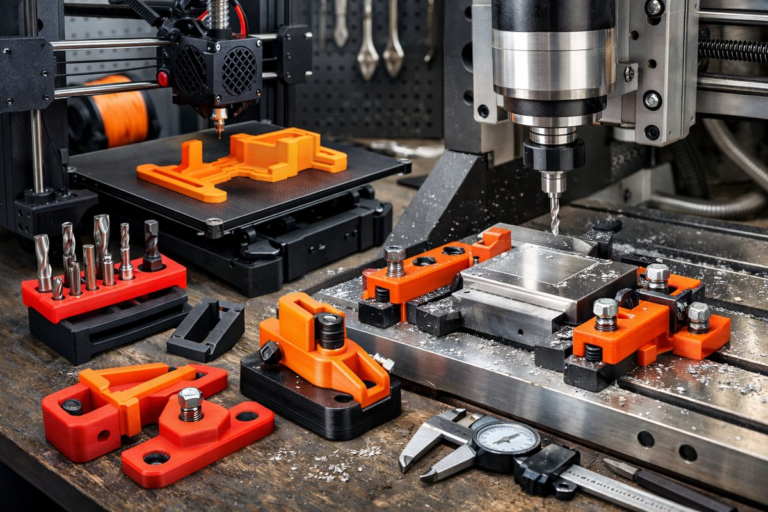
Setting Up Your Workholding
A rigid fixture underpins every successful cut. Use T-slot clamps or double-sided tape for thin stock; for thicker blocks, machine a spoil-board of MDF or phenolic resin and fasten the piece with screws or wedge clamps. Verify that the surface is flat and that the workpiece faces are square to the machine’s axes. A quick four-corner probe with a touch plate in your CAM package can ensure repeatable zero offsets.
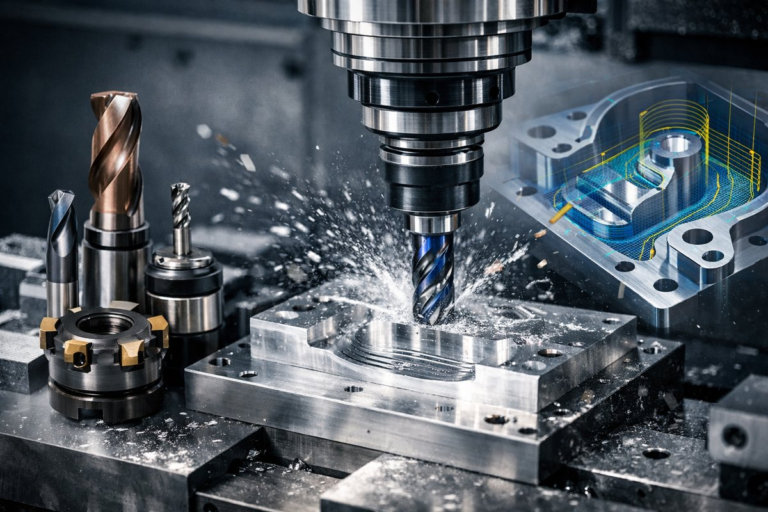
Selecting Carbide End Mills for Adaptive Clearing
Adaptive clearing, or high-efficiency milling, keeps the radial engagement of the cutter constant while varying the depth of cut. This reduces tool load and heat buildup. For this technique, a 4-flute carbide flat end mill around 6 mm in diameter can clear pockets rapidly, while a 2-flute variant excels at slotting and roughing softer materials like wood or plastic.
• 4-Flute Flat End Mill: Ideal for fast pocketing in aluminum. Offers a balanced chip load and extended tool life.
• 2-Flute Helical End Mill: Better for rapid material removal in woods and plastics; fewer flutes mean more room for chips.
• Ballnose End Mill (4 mm): Perfect for finishing contoured surfaces with a smooth scallop height.
Programming Adaptive Clearing Paths
In your CAM software, choose the adaptive or trochoidal milling strategy. Set the radial stepover to 20-40 percent of the tool diameter to keep engagement consistent. Depth of cut can be as aggressive as 3 mm in aluminum when using a high-torque spindle and rigid setup. Always check the software’s toolpath preview to ensure no collisions with clamps or fixtures.
Optimizing Spindle Speed and Feed Rate
Start with manufacturer recommendations: for a 6 mm carbide end mill in 6061 aluminum, you might spin at 15,000 RPM with a feed rate of 1,200 mm/min. Monitor chip color and form: bright aluminum chips indicate proper cutting, darker or glassy chips can signal overheating. Adjust feed up or down in 10 percent increments based on machine rigidity and material response.
Roughing Passes with Adaptive Clearing
Begin with roughing passes to remove bulk material. The steady engagement of adaptive clears generates lower cutting forces, reducing vibration. Listen for a consistent cutting tone; if you hear chatter, slow the feed or deepen the DOC slightly to stabilize. After completing roughing, inspect the interior walls for uniform machining marks.
Finishing Contours and Edges
Switch to a smaller ballnose or tapered finishing end mill for detail work. Adjust stepover to 10-15 percent of the tool diameter for a smooth surface finish. For wood, a downcut straight-flute bit can minimize tear-out on delicate grain patterns. At this stage, reducing spindle speed by 20 percent and feed by 30 percent often yields the best results without burning or smearing.
Cleaning and Inspection
After the final pass, clean chips with a shop vacuum or compressed air-always wear eye protection and a dust mask. Use digital calipers or a coordinate measuring probe to verify critical dimensions. If tolerances are tight, a light sanding or polishing step with fine-grit paper can bring edges into spec and enhance feel.
Troubleshooting Common Challenges
• Tool Deflection: If corners appear rounded, reduce overhang or switch to a stiffer tool holder.
• Excessive Heat: Watch for discoloration on metal surfaces. Reduce feed slightly or use a mist coolant if available.
• Tear-Out in Wood: Ensure sharp end mills, and consider climb milling at a slower feed.
Advancing Your Subtractive Craft
Adaptive clearing is just one method among many. Once you’ve mastered its rhythm, explore multi-axis toolpaths for undercuts or delve into micro-milling for intricate jewelry or circuit board prototypes. Combine subtractive passes with light manual finishing-like micro-files or diamond burnishers-to elevate the piece into a work of art.
By planning your design, selecting the right cutting tools, and fine-tuning machine parameters, you can transform any raw block into a precise and beautiful component. The satisfaction lies not just in the completed object, but in the quiet discipline of every perfectly controlled cut.