Location
Mount Vernon, WA 98274

Location
Mount Vernon, WA 98274
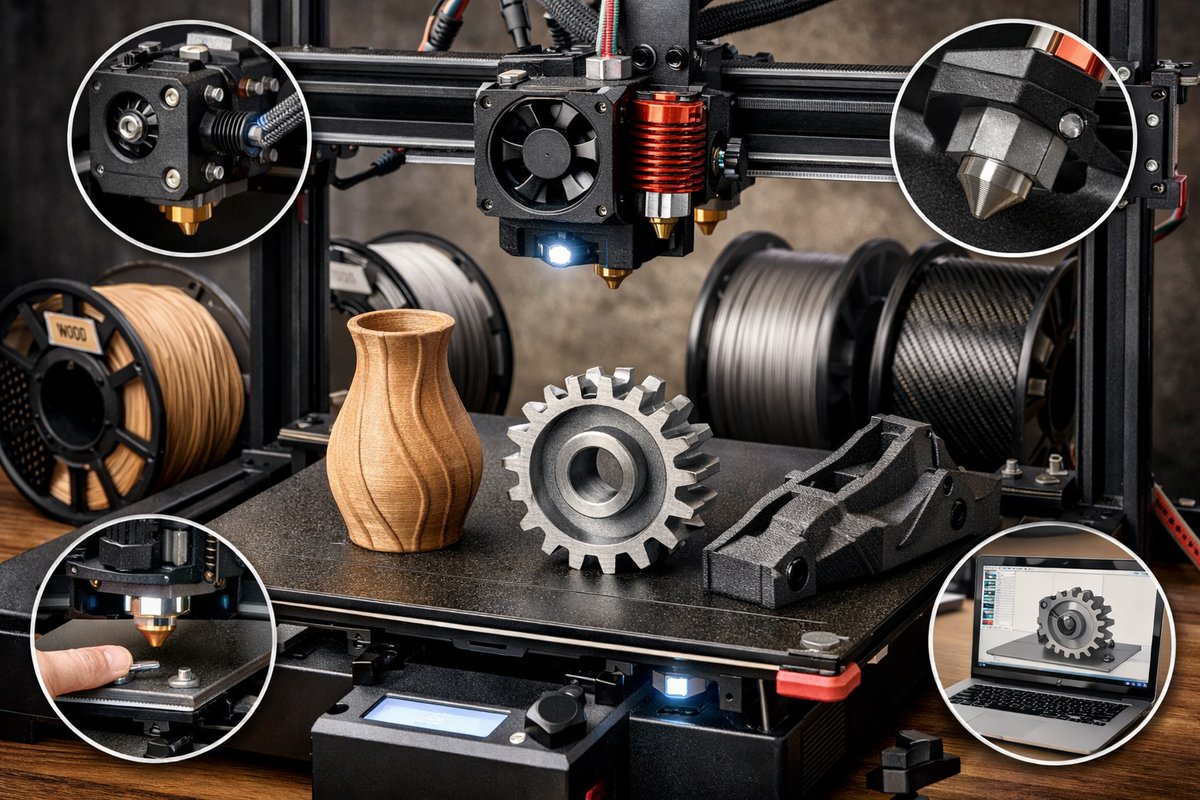
Explore how upgrading key components on a desktop Fused Filament Fabrication (FFF) printer opens the door to wood-, metal-, and carbon-fiber-filled filament projects. This guide walks through extruder, hotend, nozzle, and bed upgrades-plus slicer tweaks-to help you achieve stronger, more detailed prints and spark sustainable creativity.
The world of Fused Filament Fabrication (FFF) thrives on innovation, and composite filaments stand out as a bridge between conventional plastic prints and materials that feel more organic or perform stronger. Imagine printing objects that look and smell like real wood, have the heft of metal, or gain rigidity from carbon fibers. To unlock those possibilities, you need to fine-tune your desktop 3D printer with components built to handle abrasive, heat-sensitive, and often moisture-attracting blends.
At its core, switching from plain PLA to wood- or metal-filled filament introduces new challenges. Particles suspended in the polymer can wear down standard brass nozzles, clog easier at inconsistent temperatures, and interact differently with print surfaces. Upgrades to your extruder, hotend, nozzle, and build platform bring precision, durability, and improved adhesion. These mods transform a simple hobby machine into a versatile maker station ready for artistic, functional, and sustainable projects.
Start by evaluating your extruder. Filament blends with metal or carbon fiber are often more brittle and require a consistent, gentle grip to feed smoothly. A standard bowden setup sometimes struggles to maintain tension, causing under-extrusion or grinding. Swap in a direct-drive extruder kit with hardened gears or a planetary gear extruder. These deliver higher torque at lower filament retraction lengths, reducing pressure fluctuations when printing intricate details. The closer proximity of a direct-drive extruder to the hotend shortens the filament path, key for semi-flexible mixes and preventing jams.
Next, upgrade the hotend assembly to handle higher temperatures and abrasion. Many composite filaments print best between 200°C and 240°C. An all-metal hotend with a high-temperature heat break and robust heat sink prevents heat creep that can soften the filament prematurely. Look for a unit rated to 300°C or more. A silicone heater pad and a precision thermistor improve temperature stability-so you don’t see dramatic swings that can weaken layer adhesion or scorch particulate materials.
Nozzle choice is equally critical. Standard brass nozzles wear quickly when printing wood or metal blends. Hardened steel nozzles or a ruby-tipped nozzle resist abrasion and maintain a consistent orifice diameter over hundreds of hours. Consider experimenting with 0.4 mm and 0.6 mm nozzle sizes. The larger opening reduces back pressure from particulate matter, while a smaller nozzle can bring out finer grain textures when printing wood-filled filament.
The build surface determines the first-layer bond, which sets the stage for successful prints. Composite materials often have different thermal expansion rates and surface adhesion characteristics than pure PLA. A spring steel sheet with a PEI coating provides a reliable, removable surface that grips firmly when hot and releases cleanly once cooled. Alternatively, a glass plate with a thin layer of glue stick works for hybrid mixes, though you may need to roughen the glass slightly with fine grit paper to boost grip.
Filament storage plays a surprisingly big role in print quality. Wood- and metal-infused filaments are hygroscopic; they soak up moisture from the air, leading to bubbling, stringing, and inconsistent extrusion. Invest in an airtight filament dry box or desiccant-filled containers. For added peace of mind, a small desktop filament dryer operating between 40°C and 50°C for a few hours before printing can restore virgin-like behavior to damp spools.
With hardware in place, dial in your slicer settings for composite filament. Start with a standard PLA profile matching your new nozzle diameter, then increase print temperature in 5°C increments until layers flow smoothly and bond without visible cohesion lines. Slow down print speeds to around 30-40 mm/s to give the melted mix time to deposit and lock. Increase retraction distance by 0.5-1 mm to prevent ooze, but monitor for filament grinding and adjust tension on your direct-drive extruder accordingly.
Layer height tweaks also matter. A 0.2 mm layer height balances detail and speed, capturing the subtle grain of wood-filled filament without overtaxing the extruder. For carbon-fiber or metal blends, reduce layer height slightly to 0.15 mm if your hardened nozzle can maintain pressure. Infill patterns that provide consistent support-such as gyroid or cubic subdivision-help these heavier prints avoid internal stress points.
Beyond slicing, consider post-processing. Wood-filled prints can be sanded with fine-grit paper and stained or sealed like real wood. Metal-filled prints benefit from gentle polishing with steel wool, revealing a metallic sheen. Carbon-fiber parts gain additional rigidity when coated with an epoxy resin layer. Each filament type invites its own finishing rituals, giving your printed objects an artisanal flair.
Safety and sustainability are intertwined. Composite filaments can release ultrafine particles or toxic fumes when overheated. Always print in a well-ventilated area or use an enclosure with an activated carbon or HEPA filter. Collect failed prints and purge runs for recycling through specialized filament-recycling services. Repurposing scraps into new spools aligns with a cradle-to-cradle mindset that reduces waste in your maker space.
By methodically upgrading your extruder, hotend, nozzle, build surface, and storage, you transition from printing basic shapes to crafting composite masterpieces. Each component enhancement reinforces reliability, accuracy, and material performance. The result is a printing ecosystem where wood grains emerge, metal textures shine, and carbon-fiber strength supports functional prototypes. You’ll find fresh inspiration in every spool, whether you’re designing decorative vases, custom tool handles, or precision machine parts.
Ready to experiment? Begin with a familiar test print: a small decorative wrench or a 20 mm calibration cube featuring engraved textures. Swap through wood-infused filament, observe layer bonding, and practice sanding. Then move to a metal-filled spool to print a desk ornament with intricate cutouts. Finally, try a carbon-fiber-reinforced build for a lightweight yet stiff bracket. Document your temperature, speed, and layer height settings for each material-like a scientific journal-so you can replicate successes and refine new mixtures over time.
The beauty of composite filament printing lies in its marriage of digital control with tactile authenticity. Adding an artistic sense to manufactured parts, you reimagine what plastics can do. And with each component upgrade, you open doors to novel materials and unexpected techniques. Embrace failure as part of the journey: filament jams teach you extra about tension calibration; adhesion hiccups lead to smarter bed leveling and surface prep; stringing drama unlocks slicer mastery. Soon, you won’t just print with composite filaments-you’ll pioneer your own material blends and processes, contributing fresh ideas to the maker community.
As you pack away your tools at the end of a build day, reflect on the grains you’ve coaxed from melted composite and the precision your upgrades delivered. The heart of additive manufacturing rests on continual iteration-each upgrade, setting tweak, and finished piece brings you closer to turning raw pellets and powders into purposeful, enduring objects. With a fortified printer and a palette of composite materials, you’re poised to reshape everyday items into works of functional art.












