Location
Mount Vernon, WA 98274

Location
Mount Vernon, WA 98274
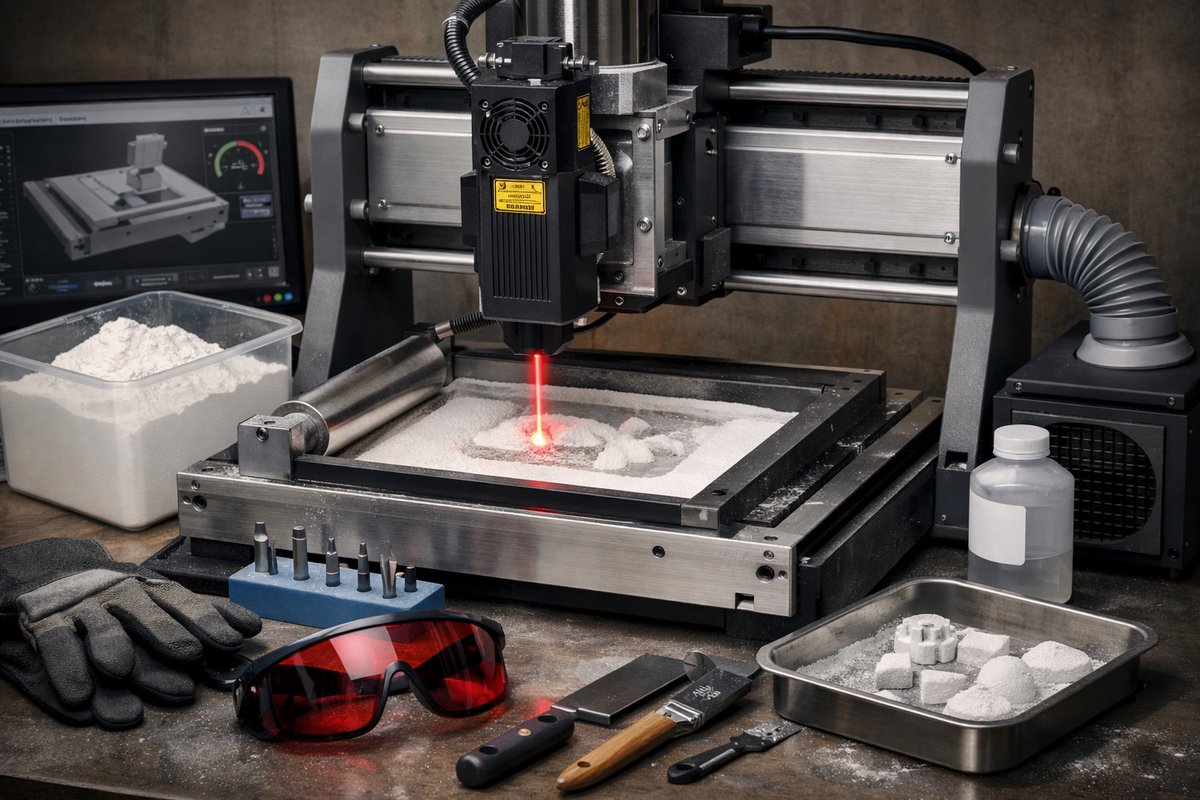
Discover how to transform a standard CNC mill into a basic selective laser sintering (SLS) system for polymer powder. This hands-on guide walks you through the key components-from laser module and powder bed kit to safety gear and finishing endmills-so you can experiment with laser-based additive manufacturing at home or in a small workshop.
In traditional subtractive machining, each pass of a cutter removes material to reveal the final shape. But what if you could flip that paradigm and add layer upon layer of powder to build complex geometries directly on your CNC mill table? By integrating a high-power diode laser and a powder-handling module, you can retrofit a desktop or hobbyist CNC mill into a basic selective laser sintering rig. This approach opens up a new frontier of hybrid manufacturing, combining subtractive precision with additive freedom.
First, assemble the core components. You’ll need a CNC mill with rigid motion control and a travel area large enough to accommodate a custom powder bed assembly. Mount a high-power diode laser module in place of a standard spindle, securing it in a focus-adjustable mount. Set up a powder bed platform that can slide under a thin metal plate or glass build surface. A recoating mechanism-such as a powder spreading roller driven by a small stepper motor-lets you deposit uniform layers of polymer powder. Finally, enclose the entire setup in a small frame to contain powder clouds and block stray laser light.
Aligning the laser focus and powder bed height is critical. Lower the build platform until the powder surface sits at the laser’s focal distance, then lock the mount. Run a test pattern on a scrap bit of metal to verify spot size and power density. Adjust laser current and speed parameters in your CNC control software until you see faint but visible sintering tracks on the test plate. This calibration step ensures your first layers fuse reliably without blowing out powder or scorching the build plate.
With alignment complete, prepare your powder bed. Spread a thin layer-typically 50 to 100 microns thick-of polymer powder across the build area using the recoating roller. The roller should glide smoothly, leaving an even blanket of powder. Use a straightedge to verify layer thickness and remove excess at the edges. Begin your G-code program: move the laser in raster or hatching passes across the powder area, sintering each cross-section of your part. When the pass is complete, index the table down by one layer height, recoat powder, and repeat. Over dozens of cycles, your part emerges amid a bed of loose powder.
Once the last layer is sintered, allow the build to cool fully inside the enclosure to minimize warping. Carefully remove the block of unsintered powder and extract your part with gentle brushing or compressed air. At this point, the surface will feel grainy. To achieve smoother walls, mount an appropriate endmill-such as a fine-fluted ball nose bit-into your CNC spindle. Program a light finishing pass, carving away a fraction of a millimeter to reveal refined contours and crisp edges. This hybrid finish shows both the fine detail of SLS and the polish of subtractive milling.
Troubleshooting tips often focus on powder behavior and laser settings. Too much powder thickness can starve the laser of energy and leave layers loose. Too little powder or too much power may melt the bed or cause warping. Experiment with layer heights, scan speeds, and hatch spacing to strike the right balance. Keep your enclosure and extractor running to remove airborne particles. Inspect your optics often for powder buildup, and clean lenses with isopropyl alcohol when sintered residue appears.
Safety is paramount when working with lasers and fine polymer powders. Wear laser protective glasses rated for your diode’s wavelength, and use a powder mask or respirator to avoid inhaling nanoparticles. Ground your powder bed and mill frame to prevent static cling from trapping powder in unwanted areas. A small fume extractor or filter fan will clear loose particles without blowing them into your workspace. Always switch off the laser and let all moving parts come to a complete stop before reaching inside the enclosure.
Combining laser sintering with CNC finishing transforms a simple milling machine into a multipurpose rapid-prototyping center. You’ll explore shapes that would be impossible with cutters alone and discover new workflows for custom fixtures, intricate pores, or lattice structures. As you refine settings and improve powder handling, you’ll gain intuitive control over both additive and subtractive phases. Next time you need a hollow manifold or a lightweight grid, you’ll know exactly how to harness the quiet discipline of subtractive carving alongside the creative possibilities of layered build-up.
This DIY SLS approach may not match the speed of industrial machines, but it offers an accessible entry point. Whether you’re a hobbyist, a small-shop fabricator, or a student exploring hybrid manufacturing, the combination of a diode laser, powder bed, and CNC finishing endmill invites experimentation. Assemble your kit, dial in your parameters, and let subtractive tradition guide you through the additive future of making.












