Location
Mount Vernon, WA 98274

Location
Mount Vernon, WA 98274
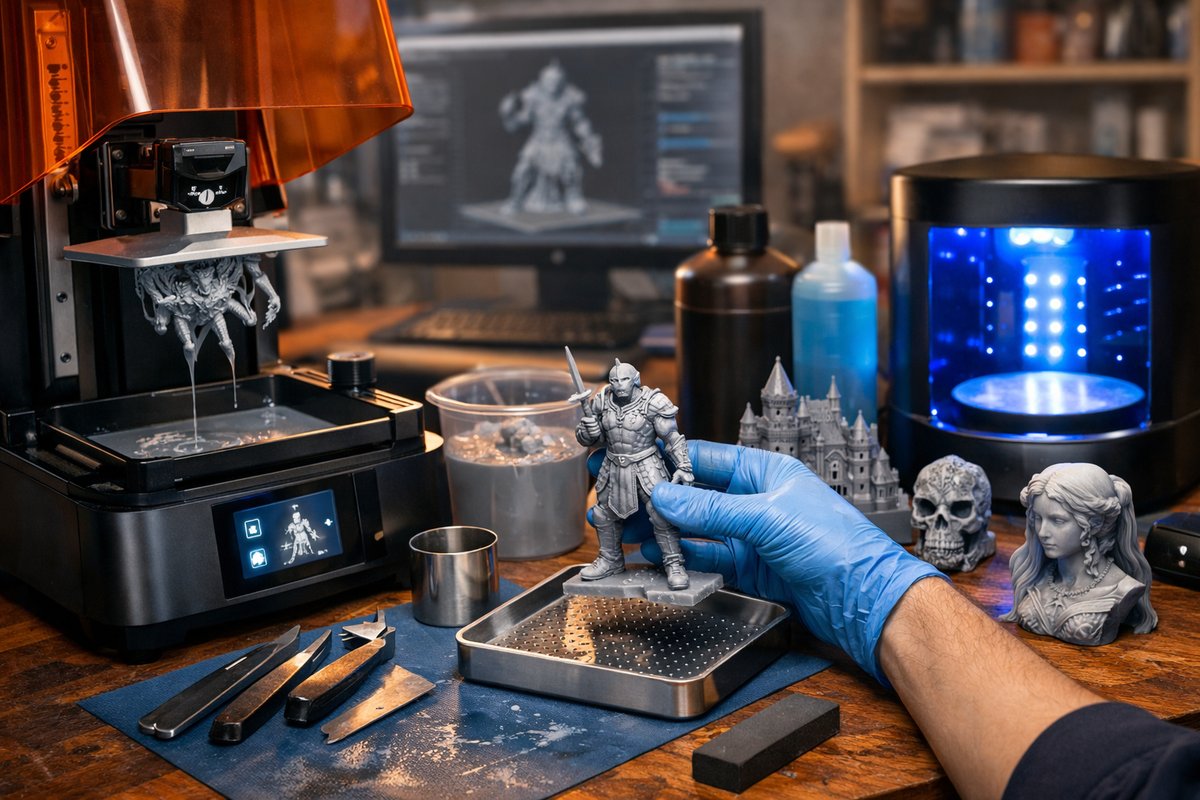
Dive into the world of resin-based additive manufacturing with a hands-on tutorial covering everything from machine setup and resin selection to post-processing and print optimization. This guide demystifies vat photopolymerization, providing the practical know-how and tools you need to turn digital designs into finely detailed objects at home or in a small workshop.
Resin 3D printing, also known as vat photopolymerization, offers precision and surface detail that traditional filament-based printers often cannot match. By selectively curing liquid resin with ultraviolet light, these machines can create parts with intricate features, sharp edges, and smooth finishes. Whether you’re crafting miniature figurines, dental models, or functional prototypes, mastering resin printing can open new possibilities for your projects.
To get started, you’ll need a resin 3D printer equipped with an LCD or DLP light source, a selection of photopolymer resin types, and a handful of post-processing tools. Unlike FDM machines, resin printers operate inside a sealed vat and rely on precise layer exposure times, so careful calibration and safety precautions are critical. Let’s walk through each phase of the workflow and highlight key components that ensure success.
First, prepare your workspace. Resin printing can be messy and requires adequate ventilation. Lay down disposable silicone mats or heavy-duty paper to catch drips. Keep nitrile gloves and safety glasses at hand to protect skin and eyes from uncured resin. Position a small fan or fume extractor nearby to reduce volatile organic compounds in the air. Organizing your tools-scraper blades, funnel, filter mesh-before beginning will speed up cleanup and minimize mistakes.
Next, level the build platform. Most resin printers use a screw-adjustment system beneath the vat. Homes with a resin printer include a leveling card or thin sheet; place it between the platform and the vat floor, then tighten the screws until you feel slight resistance when sliding the card. This ensures the first layer adheres smoothly. Always perform a test print of a calibration shape, such as a hollow cube or single-layer rectangle, to verify consistent exposure across the build area.
Design or download your 3D model in a suitable file format (STL or OBJ). Use slicing software that supports resin workflows; it will generate a series of UV exposure commands and lift motions. Go to your software’s resin settings and choose a profile matching your material’s recommended exposure time-commonly between two and eight seconds per layer. Adjust the layer height to balance detail and speed: 50 microns yields high resolution, while 100 microns prints faster with slightly coarser surfaces.
Supports are crucial for gravity-defying features such as overhangs and bridges. The slicing program can auto-generate support structures, but manual editing often produces cleaner results. Add slender columns under cantilevers, and reinforce tall, thin elements to prevent wobble. Thicken support bases so they grip the build platform firmly, but keep them narrow at the connection points for easier removal.
Once your file is sliced, pour resin into the vat up to the fill line. Close the printer lid to block ambient light, and start the print job. The machine will lower the platform into the resin, expose the first layer, then lift and repeat. Layer-by-layer, your object will emerge from the liquid medium. Monitor the process for the first few minutes to ensure proper adhesion; if you see peeling or resin seeping under the edge, pause and re-level the platform.
After printing, remove the build platform and scrape off the cured part with a plastic scraper. Place the object in a container of isopropyl alcohol, swirling gently for two to five minutes to dissolve excess resin. A dedicated wash station streamlines this step with a rotating basket or agitation system. Avoid prolonged soaking beyond recommended times to prevent over-softening of details.
Dry the piece thoroughly before moving on to UV curing. Inadequate drying can trap alcohol under the surface and leave white streaks. Use compressed air or let the object air-dry on a clean, lint-free surface. Place it in a curing chamber or under a UV lamp according to resin specifications, typically for five to fifteen minutes per side. Proper curing locks in mechanical strength and stability, transforming the part from a fragile state into a durable object.
After curing, carefully remove supports with flush-cut pliers, snipping as close to the base as possible. Sand or file support marks lightly to blend them with surrounding surfaces. You can also fill small pits with a drop of clear resin and cure again for a flawless finish. Painting and sealing follow naturally once the surface is smooth-acrylic paints adhere well to cured resin, and a matte or gloss clear coat can enhance durability.
Choosing the right resin affects every stage of this workflow. Standard resins offer balanced stiffness and detail for general prototypes. Tough resins deliver impact resistance for functional parts, while flexible resins bend without breaking. Specialty formulations include castable resin for jewelry molds and biocompatible resin for dental applications. Always follow the manufacturer’s storage and handling guidelines to maintain shelf life and consistency.
Temperature control also plays a role in quality. Resin viscosity changes with ambient heat: low temperatures can make resin too thick, leading to layer separation, while high temperatures may accelerate curing and clog your vat film. Aim to keep your workspace between 18 and 25 degrees Celsius. If needed, use a small heater or climate-controlled enclosure to stabilize conditions.
Maintenance of the printer ensures long-term performance. Clean the vat and platform after every print, replacing the FEP film if it shows cloudiness or pinholes. Check the LCD screen for resin spills, wiping it gently with isopropyl alcohol to avoid scratching. Lubricate moving parts on the Z-axis to reduce motor strain and maintain layer accuracy. Run a test print whenever you swap resins or move your machine.
To refine your skills, experiment with exposure trials. Print a single-layer test square at varying durations, then examine under magnification for overcure (bleeding, rounded edges) or undercure (sticky, incomplete features). Record your optimal settings for each resin type and layer height. Keeping a print journal helps you track successes and troubleshoot future jobs faster.
Resin printing can also benefit from modular accessories. A dedicated post-processing station unifies washing and curing in one device, saving benchtop space and reducing cross-contamination. Replaceable resin filters and strainers help pour used resin back into the bottle, minimizing waste. Magnetic build plates offer faster part removal compared with rigid platforms, and themed build plate patterns can improve bottom-layer adhesion.
Safety remains paramount. Ventilate your workspace, wear gloves and eye protection, and sanitize spills immediately with paper towels and alcohol. Dispose of used resin and contaminated wipes according to local regulations-uncured resin is a hazardous material and must not enter household plumbing. Cured scrapings can be thrown in regular waste once fully polymerized.
Embracing resin printing invites a new level of detail in your prototypes and models. From product design to miniatures and dental tools, vat photopolymerization bridges the gap between virtual creativity and tangible reality. By mastering each workflow step-leveling, exposure, washing, curing, and finishing-you’ll unlock consistent, high-quality results.
With practice, you’ll develop a feel for support placement, resin behavior, and post-processing tricks that yield professional-grade parts. Bookmark your favorite slicing profiles, curate a resin collection suited to your projects, and refine your tool kit over time. Soon enough, you’ll find resin 3D printing not just a hobby but a powerful extension of your maker skills, capable of realizing intricate concepts with unmatched precision.
Whether you’re a curious beginner or a seasoned maker aiming for finer resolution, this guide equips you to explore vat photopolymerization confidently. Gather the recommended components, follow the calibration routines, and enjoy the rewarding process of watching your digital vision solidify into reality, layer by delicate layer.












