Location
Mount Vernon, WA 98274

Location
Mount Vernon, WA 98274
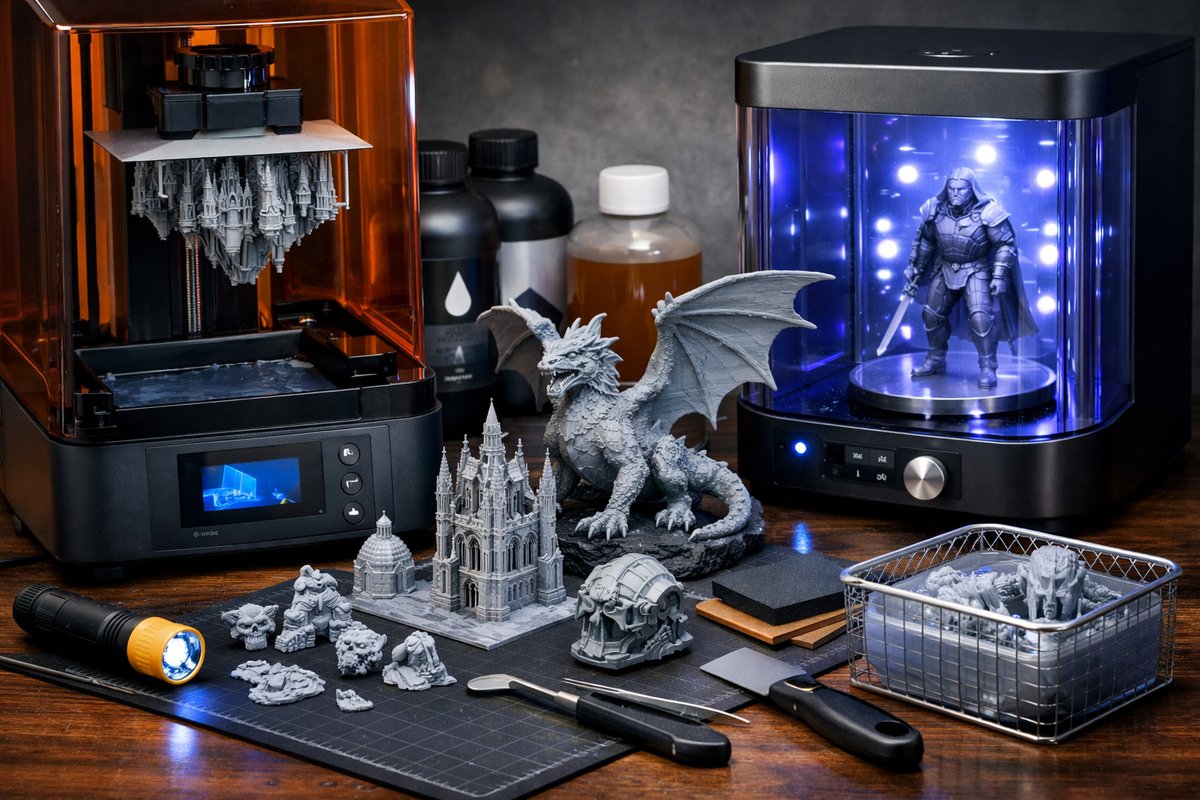
Discover how desktop resin 3D printing brings digital designs into crisp, high-detail reality. This guide walks you through each phase-from choosing the right photopolymer resin to post-processing with UV curing-so you can confidently create intricate models at home or in your studio.
Resin-based additive manufacturing has become a go-to technique for anyone seeking ultra-fine detail, smooth surfaces, and material properties that rival traditional manufacturing. While filament extrusion systems excel at rapid prototyping, desktop resin printing-also known as LCD or MSLA (Masked Stereolithography Apparatus)-opens doors to intricate miniatures, medical models, jewelry patterns, and even functional prototypes. Layer thicknesses below 50 microns, combined with light-curing photopolymer chemistry, unlock a level of precision that’s hard to achieve any other way. This article unpacks the hardware, materials, software, and best practices you need to get started and achieve consistent, high-quality prints.
At the heart of a resin printer is a UV backlight shining through a masked LCD panel. Each pixel in that mask defines a tiny cross section of your model; the liquid resin cures wherever UV light hits. The build plate then lifts, allowing uncured resin to flow back under the FEP film at the bottom of the vat. With each cycle lasting just a few seconds, your object emerges layer by layer. Modern LCD panels, combined with 3D motion systems, let you dial in layer heights as fine as 25 microns, yielding surface finishes smooth enough for direct painting or molding.
Getting started means choosing a reliable desktop resin printer. Look for a sturdy Z-axis rail, a stable build plate leveling system, and a high-resolution LCD panel (2K or 4K). A well-designed enclosure with a detachable vat and an easy-to-use touchscreen interface can make the first few prints far less intimidating. From there, selecting the right photopolymer resin is crucial: standard resins offer balanced stiffness and detail, tough resins resist impact for functional parts, and castable resins burn out cleanly for jewelry and dental applications. Each formulation comes with its own exposure time recommendations, viscosity, and post-cure requirements.
Design preparation starts in CAD or sculpting software, but before sending a model to the printer you’ll import it into slicing software. Programs like ChiTuBox, Lychee Slicer, or PrusaSlicer with resin mode let you adjust orientation, add support structures, set layer times, and slice the model into sequential UV masks. Proper orientation can minimize overhangs and reduce the number of supports, but be careful: surfaces near supports often need extra sanding or filler. A slight tilt-10 to 30 degrees-can improve resin drainage and help avoid suction forces that might cause print failures.
Once your slicing profile is set, pour photopolymer resin into the vat-just enough to cover the bottom film. Wear nitrile gloves and a respirator mask in a well-ventilated space to handle uncured resin safely. Start the print and watch as the build plate dips into the vat, the mask images flash, and each cured layer adheres to the plate. A clear enclosure lets you monitor peeling actions and catch any sticky layers early. If you see large blobs or resin not adhering properly, pause the print and level the build plate; an unlevel plate is the most common culprit behind first-layer failures.
When the print finishes, remove the build plate and gently pop your object off with a flexible scraper. At this stage, you’ll have two tasks: cleaning and curing. Rinse the part in a bath of 90-99% isopropyl alcohol, agitating to remove uncured resin from surface crevices. Some makers use ultrasonic cleaners for deeper penetration; just be mindful of leaving delicate pieces submerged too long. After cleaning, let excess alcohol drip off, then place the model in a UV curing station or under a UV-LED lamp. Curing times vary-often between two and ten minutes per side-but fully cured models resist deformation and reach full material strength.
Calibrating exposure settings and layer heights is a process of trial and error. Many resin communities share exposure test cubes: small hollow cubes with internal cavities that indicate under- or overexposure based on how cleanly they print. Running these calibration prints whenever you change resin brands, vat film, or lighting can save hours of frustration. Keep a simple logbook of exposure times, layer thicknesses, and ambient temperature to track repeatable settings for each resin type.
Beyond basic prints, advanced users explore multi-material and color mixing accessories, flexible resins for snap-fit parts, and specialized absorbent systems to recycle uncured resin. Some desktop printers support dual-resin vats or stirring mechanisms to blend two formulations on the fly. Others integrate closed-loop leveling sensors that automatically adjust the build plate mid-print. As you accumulate parts and prototypes, a digital caliper becomes indispensable for verifying dimensions down to 0.01 millimeters, ensuring that mating features and tolerances meet design specifications.
Part of the allure of resin printing is post-printing finishing. Sanding and priming can smooth out faint layer lines; wet sanding with fine-grit paper produces glass-like finishes. Thin cyanoacrylate adhesives and tiny brushes fill gaps in microscopic details. For decorative pieces, airbrushing primer followed by acrylic paints reveals crisp shadows and highlights. Functional prototypes often go through an acetone vapor smoothing for nylon-like surfaces, though the practice requires proper ventilation and safety gear.
Maintenance plays a big role in long-term success. Replace the FEP film in the vat at the first sign of scratches or cloudiness, and clean the vat walls regularly. Filter leftover resin through a fine stainless-steel mesh before returning it to the bottle-this removes cured bits that could cause later print defects. Wipe down the LCD screen and build plate with isopropyl alcohol after every print to prevent adhesive buildup. A periodic calibration of the Z-axis endstop ensures each first layer cures at the correct distance from the film.
Environmental considerations also come into play. Many photopolymer resins contain VOCs and require proper disposal methods. Opt for resins marked as low-odor or low-VOC to reduce fumes, and always cure leftover resin before discarding. Some makers collect cured resin scraps and grind them into filler materials for other manufacturing processes. With growing awareness, recycling programs and biodegradable resin formulations are emerging to reduce the ecological footprint of desktop additive manufacturing.
Whether you’re a hobbyist crafting miniatures or an engineer validating functional prototypes, mastering resin printing opens creative and practical horizons. The ability to produce parts with precise geometry, fine features, and a smooth finish makes this technique invaluable across design, healthcare, education, and small-batch manufacturing. By following systematic leveling, exposure calibration, post-processing, and maintenance routines, you’ll build a foundation that transforms occasional experiments into consistent, high-quality outputs.
Ready to dive in? Equip yourself with a dependable desktop LCD resin printer, high-quality photopolymer resin, effective cleaning and curing stations, plus essential safety and calibration tools. With practice and meticulous attention to each step, layer after layer, you can turn digital ideas into tangible reality-and become part of the fast-growing community shaping the future of additive manufacturing.












