Location
Mount Vernon, WA 98274

Location
Mount Vernon, WA 98274
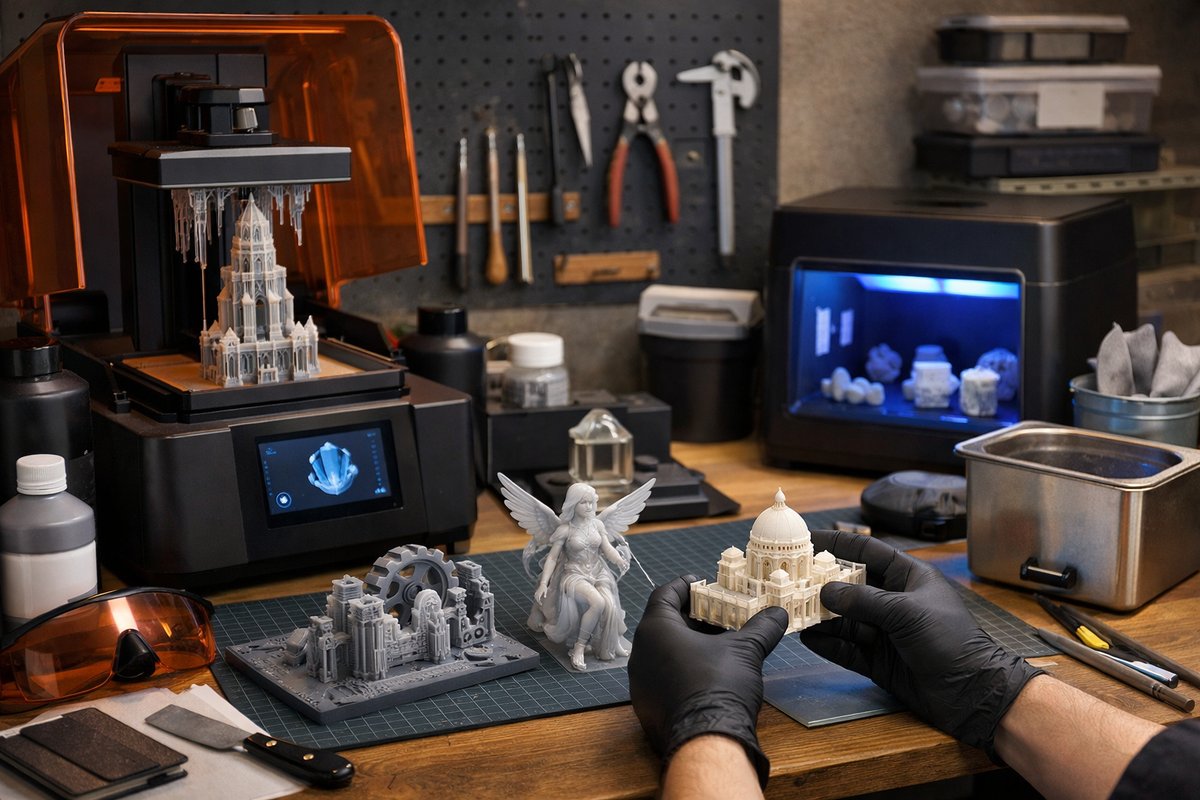
Discover how to harness desktop stereolithography (SLA) for precise, intricate prototypes at home or in the studio. This detailed guide walks through choosing the right printer, resin, and post-processing tools to achieve professional-quality results without prior experience.
Additive manufacturing has opened a door to rapid prototyping and creative exploration, and among its many flavors, desktop resin SLA stands out for its unmatched level of detail. Layer by layer, liquid photopolymer cures under an ultraviolet beam to reveal fine features that traditional FDM methods struggle to render. Whether you’re crafting scale models, jewelry prototypes or dental guides, this process transforms digital designs into tangible reality through a blend of precision engineering and material science.
At its core, an SLA system uses a high-resolution LCD or laser to selectively harden liquid resin in a shallow vat. This yields surface finishes smooth enough for direct painting or functional testing. The trade-offs include a need for extra post-processing-rinsing prints in isopropyl alcohol, removing supports, and applying a final cure under controlled UV light. But the payoff comes in razor-sharp edges, fine text and organic textures that rise directly from your 3D model.
Your first major decision is selecting a printer that balances resolution, build volume and usability. Entry-level machines often offer a build area of around 5 to 6 inches square, with 50 to 70 microns of XY accuracy. Prosumer models push down to 20 microns, perfect for tiny parts like detailed miniatures or jewelry casts. Look for an enclosed chamber with a clear cover, which filters ambient UV and helps maintain a stable temperature to reduce layer warping.
The printed object depends heavily on both hardware and consumables-especially the resin itself. Standard resins deliver crisp details and come in a variety of colors, from neutral gray to translucent hues. Tough resins mimic the mechanical properties of ABS plastic, while flexible variants bend under pressure without cracking. Castable formulations burn out cleanly for investment casting. When selecting a resin, consider shrinkage rates, viscosity (which affects layer adhesion) and your end-use environment. Always check compatibility with your machine’s light wavelength to ensure complete curing.
Before hitting print, prepare your digital model in slicing software that generates the cross-sections and support structures. Orient the part at a slight angle-typically 10 to 30 degrees-to minimize the number of contact points that could mar a smooth face. Supports should attach at corners or non-critical surfaces, and their thickness can be fine-tuned to balance easy removal against solid adhesion during printing. Enabling a built-in rafts or brim can improve initial layer stability, especially when working with tall, slender shapes.
Once the file is sliced, pour the chosen resin into the vat, being mindful not to exceed the maximum fill line. Initiate the print and watch as each ultra-thin layer of resin hardens almost invisibly. The platform lifts slowly between layers, allowing fresh liquid to flow back under the print. While unattended runs can be tempting, periodic checks help detect issues like layer separation, trapped air bubbles or resin contamination before they ruin a long job.
When the printer finishes, slide out the build plate and lift the part off using the provided scraper or a similar tool. It’s still covered in uncured resin, which calls for immediate cleaning. A two-bath isopropyl alcohol station works best: use one tray for a rough rinse and a second for a final, clearer pass. A soft, lint-free brush helps dislodge stubborn spots. Ensure you wear nitrile gloves and a respirator mask-both protect against skin contact and inhalation of vapors during this phase.
Drying the piece carefully after washing prevents streaks or water spots from forming. Gently shake off excess liquid and lay the part on a silicone mat or paper towel in a well-ventilated area. Allow a few minutes for residual alcohol to evaporate before transferring the print to the curing station.
Post-cure is critical. A UV curing station with adjustable wavelength and rotation delivers even exposure, reducing the risk of over-brittleness or sticky patches. Typical cure cycles range from two to ten minutes per side, depending on resin type and lamp intensity. Some users rotate the part manually or place it on a turntable for a uniform result. This step locks in mechanical strength and ensures long-term stability of fine features.
With the part fully cured, remove supports using flush cutters or a hobby knife, taking care not to gouge nearby surfaces. Light sanding with fine-grit sandpaper (200 to 400 grit) smooths support scars, followed by primer if you plan to paint. For a polished look, wet-sand progressively up to 1000 grit and apply a clear coat. These finishing touches can transform functional prototypes into display-quality models.
Sustainability and maintenance matter as much as print quality. Filter used resin back into its bottle to capture cured particulates, and recycle isopropyl alcohol by letting particulates settle and decanting clear liquid for your next cleaning session. Replace the FEP film at the bottom of the vat only when you notice layer lines or bonding issues; changing it too early adds cost, while delaying invites print failures.
Common pitfalls include insufficient platform leveling, which leads to uneven first layers, and overexposed support tips that fuse too firmly to the print. If parts warp at corners, try lowering exposure times or increasing lift speed between layers. For sticky residues after curing, extend UV time in 30-second increments. Familiarize yourself with your slicer’s “Z lift” and “anti-aliasing” settings-they can dramatically improve surface smoothness without reworking the model.
Venturing into desktop SLA can feel like stepping into a chemistry lab, but once you master each stage-printer calibration, resin selection, support placement, washing and curing-you stand poised to transform digital imagination into finely detailed physical objects. This technique offers a balance of precision and speed rarely matched in hobby-level 3D printing, making it a gateway to new design possibilities.
Take the first step by assembling your toolkit: a reliable printer, a versatile resin, a dedicated cleaning station and a robust curing platform. As you iterate on small trial prints, you’ll develop the muscle memory and confidence to tackle larger, more complex projects. The rewards come in seeing intricate gear teeth mesh perfectly, floral patterns emerge with crisp edges or custom tools fit seamlessly into an assembly.
Whether you aim to prototype mechanical parts, craft bespoke jewelry or explore biomedical modeling, desktop resin SLA stands as a versatile pillar in the additive manufacturing landscape. With patient practice, deliberate material choices and mindful post-processing, you’ll unlock a level of detail that bridges the gap between concept and reality. Gather your tools, prepare your workspace and join the community of makers who discover new creative frontiers through the magic of light-cured polymers.












