Location
Mount Vernon, WA 98274

Location
Mount Vernon, WA 98274
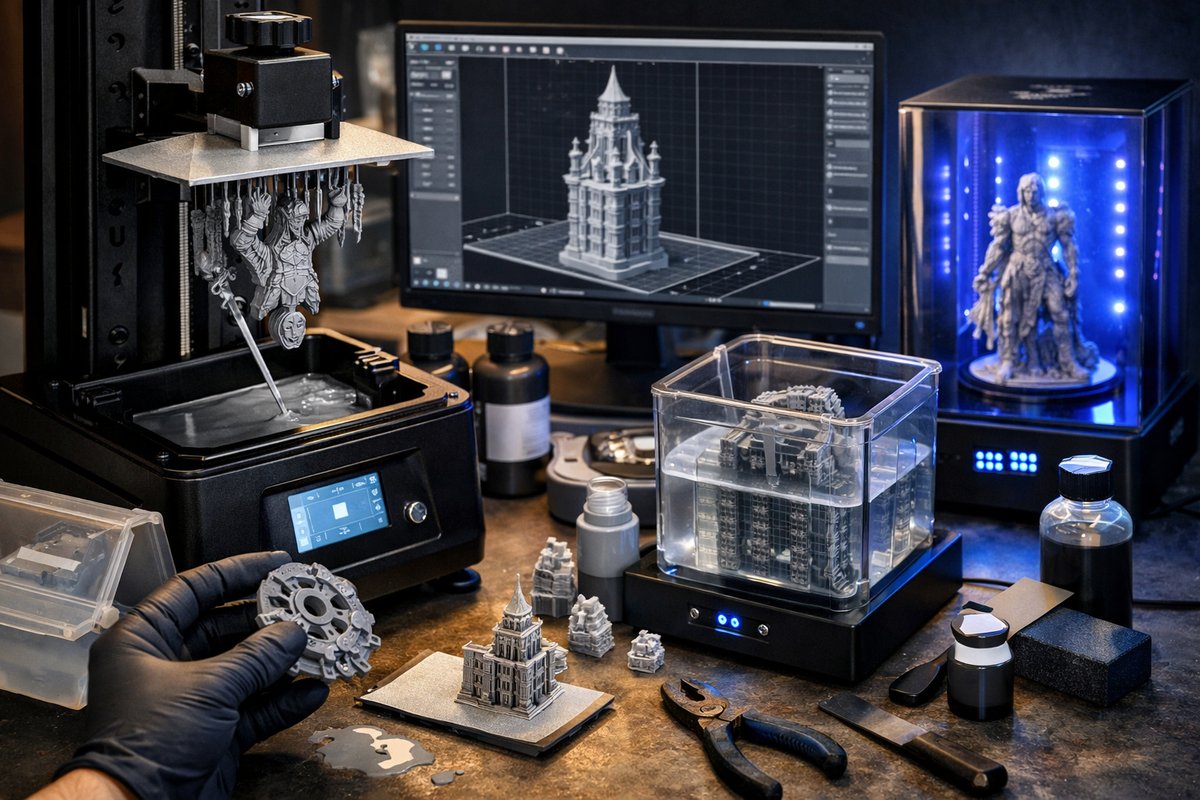
Discover how vat photopolymerization transforms digital models into ultra-fine tangible parts using resin, LCD or DLP printers, and post-processing essentials. This step-by-step guide walks you through selecting components, calibrating exposures, slicing designs, and perfecting wash and cure techniques to unlock high-resolution prototypes.
Additive manufacturing opens doors to shapes that once lived only in imagination. Among its many approaches, vat photopolymerization-often called resin 3D printing-stands out for delivering exceptionally detailed and smooth surfaces. By layering liquid photopolymer resin and curing each slice with UV light from an LCD or DLP source, hobbyists and professionals alike can produce jewelry prototypes, dental models, miniatures, and intricate mechanical parts with unmatched fidelity. If you’re curious about diving in, here’s everything you need to know to start printing, cleaning, and curing top-quality resin pieces on your desktop.
First, let’s explore the heart of the process: the vat printer. Unlike filament-based machines that extrude melted plastic, resin printers expose each cross section of your design to UV light, hardening the photopolymer one layer at a time. LCD variants mask an entire layer through an LCD panel, while DLP systems project patterns with a digital projector chip. Both achieve resolutions as fine as 50 microns or better. That means crisp overhangs, delicate lattice structures, and smooth curves without the stepped look common in FDM parts. Industries from dentistry to engineering labs rely on this accuracy for functional prototypes, surgical guides, and finely detailed models.
Getting started requires a few core components. At minimum, you’ll need an LCD or DLP resin printer, a build platform, a resin vat with replaceable FEP film, standard photopolymer resin in your preferred shade, and a slicing package tailored for photopolymer workflows. Many printers include a basic slicer, but third-party tools often offer more control over support density, exposure times, and custom peeling settings. Other essentials include a rinsing station-typically an enclosed container for isopropyl alcohol cleaning-a UV curing station to finish off your parts, protective gear such as nitrile gloves and safety glasses, plus tools like plastic scrapers and digital calipers to ensure precision.
Choosing the right resin influences surface finish, mechanical properties, and post-cure strength. Standard resins handle general display models well, offering balanced hardness and flexibility. Tough resins resist brittleness under stress, making them ideal for functional prototypes or snap-fit assemblies. Flexible formulations mimic rubber-like properties for gaskets or wearable parts, while castable resins burn out cleanly for investment casting in jewelry. Specialty resins bring biocompatibility for dental guides, transparent grades for light-pipe prototypes, and even wood-fill variants that look and feel like timber after post-processing. Starting with a reliable grey or clear standard resin teaches the flow of vat photopolymerization before branching into niche materials.
Software prep begins by importing your STL or OBJ design into the slicer. Pay close attention to orientation: tilting pieces at a slight angle reduces suction forces during the peel process and minimizes support contact with critical surfaces. Generate supports where overhangs exceed 45 degrees, dialing density higher for fine features that require extra stability. Slice at a layer height compatible with your resin and printer-typically 50-100 microns for balance between speed and detail. Assign exposure times for each layer: manufacturers supply base values, but running a small test print tower helps dial in exact timing for your combination of resin, printer, and ambient temperature.
Calibration is crucial. Create a simple exposure test pattern with squares or thin walls printed at varying times. Compare results under magnification to see which setting yields fully solid walls without over-polymerization that blurs fine detail. If walls feel tacky or break apart, increase exposure by two-second increments until they harden cleanly. Too much light can cause bleeding between features, so finding the optimum window ensures sharp edges. Similarly, calibrate your initial bottom layer exposures longer to secure adhesion to the build platform, then switch to standard times for the bulk of the print.
With everything set, level the build plate according to your printer’s manual-often by sliding a piece of paper under the plate and adjusting screws until you feel light drag at each corner. Pour resin into the vat just above the minimum fill line, secure the vat, and start the job. Monitor the first layers: you should see even curing patches without warping or lifting. If the platform doesn’t adhere, re-level or roughen the plate with fine-grit sandpaper then clean and re-level. After confirming a stable build, you can step away while the printer handles the rest, though occasional checks help catch resin overflow or stray debris that might compromise the FEP film.
Post-print, waiting can be tempting, but the uncured resin remains sticky and toxic. Carefully remove the build plate and use a plastic scraper to peel parts off. Immediately submerge them in a rinse station with 90-99% isopropyl alcohol. Agitate gently by swirling or using a small brush to dislodge uncured resin. Two-stage cleaning-first in an IPA bath, then a quick dip in a second fresh bath-ensures no residual photopolymer remains. Allow components to drip-dry in a well-ventilated area away from direct sunlight before moving to final curing.
UV post-cure locks in mechanical strength and stabilizes the color. Place parts in a dedicated UV curing station with rotating platform or multi-angle exposure. Cure for 2-10 minutes depending on resin thickness and station output power-check your resin’s datasheet. For complex geometries, pause midway, flip the parts, and continue curing to reach shadows beneath overhangs. Throughout this step, keep gloves on and avoid direct skin contact with uncured surfaces, as the UV-induced reaction can cause irritation.
Safety matters. Always wear nitrile gloves when handling uncured resin, and consider a respirator rated for organic vapors in poorly ventilated spaces. Eye protection prevents splashes from landing on sensitive surfaces. Work near a window or under a fume hood if possible, since resin fumes can be unpleasant. Store resin in an opaque, sealed container away from direct light and heat. Dispose of alcohol wash solutions at designated hazardous waste facilities-never pour large quantities down regular drains.
Even experienced users face occasional hiccups. If you see layer shifts, check for loose belts, pulleys, or a wobbly build plate. Resin dripping into the Z-axis screws can gum up mechanisms, so keep the screw rod protected. Prints that separate mid-build often indicate insufficient bottom layer exposure or a dirty platform. Sticky bottom surfaces suggest over-exposure or resin cured on the FEP film-replace or relevel the vat. Regularly inspect and replace FEP sheets to maintain clarity and consistent peeling force.
As you gain confidence, experiment with pigment additives and clear cast resins for colored or transparent parts. Maintain a stable ambient temperature near 20-25 °C to achieve reproducible cures-cold rooms slow photopolymerization, warm rooms accelerate it. For delicate jewelry patterns, consider running multiple thin “base coats” before full-speed printing to lock small details. When printing functional hinges or snap fits, print multiple test geometries to find optimal clearance values, adjusting your CAD model or slicer offset until parts snap smoothly without cracking.
The journey from digital sketch to polished mini stands on selecting the right gear, mastering exposures, cleaning meticulously, and curing uniformly. Start with a simple keychain or mini figurine to internalize support placement, orientation, and wash times before tackling complex assemblies. As your skill grows, resin printing can produce custom orthodontic trays, fine jewelry molds, anatomical models, or precision tools. By understanding each step-slicer configuration, printer calibration, safe handling, post-processing, and troubleshooting-you transform an LCD or DLP desktop box into a micro-factory capable of bringing ideas to life with photopolymer magic.












