Location
Mount Vernon, WA 98274

Location
Mount Vernon, WA 98274
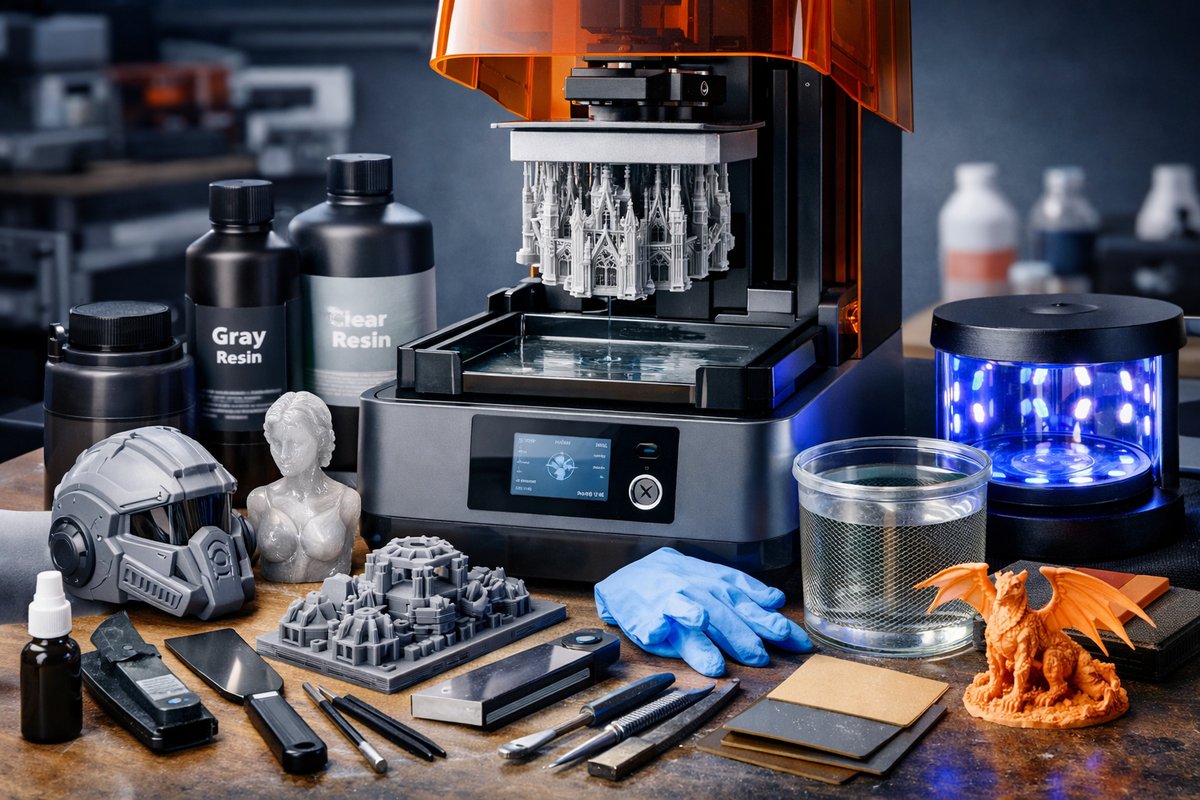
Discover how resin-based stereolithography blends precision and versatility for desktop additive manufacturing. This guide walks you through every stage-from selecting the right resin and printer components to post-processing-to empower your next high-detail project.
In the world of desktop additive manufacturing, stereolithography (SLA) stands out for its exceptional surface finish and intricate detail. SLA uses a UV light source to cure liquid resin layer by layer, transforming digital models into tangible prototypes with remarkable accuracy. Whether you’re designing dental models, wearable prototypes, or finely detailed miniatures, this technique unlocks possibilities that filament-based systems struggle to match. Here, you’ll learn not only how SLA printing works but also how to choose and use key components-resins, vats, build platforms, and post-processing tools-to achieve professional results in your workshop.
The first step in any successful resin print is choosing the right material. Standard photopolymer resins provide a balance of mechanical strength and surface quality, ideal for general-purpose prototyping. If you need more toughness, look for resins formulated for impact resistance or elongation, which mimic the properties of flexible plastics. For jewelry or dental applications, biocompatible or castable resins are available, designed to burn out cleanly for investment casting. When reviewing resins, consider viscosity (lower viscosity flows more easily), exposure time (shorter cure times speed up production), and color opacity (clear resins require longer exposure). Selecting the right resin sets the stage for reliable layer adhesion and minimal print failures.
Next, let’s examine the heart of the machine: the resin vat and build platform. The resin vat holds the uncured liquid, and its film or FEP liner must remain taut and scratch-free. A worn vat film can lead to suction forces that pull prints off the platform. Replacing or maintaining the film kit keeps your print bed adhesion consistent. The build platform-where layers stack-should be level and properly textured. Some platforms have perforations or diamond-textured surfaces to improve resin grip. Always follow your printer manufacturer’s leveling procedure or use a digital caliper to verify gap uniformity. A well-leveled platform ensures the first few layers anchor firmly, reducing the chance of print detachment during curing.
Once your resin and hardware are sorted, prepare the digital model. Use a slicer software that supports SLA workflows, importing your design in STL or OBJ format. Orient parts to minimize overhangs and reduce the number of supports needed. Angling models at 30 to 45 degrees often provides the best balance between surface quality and support structure complexity. Generate supports with just enough contact points: too few and the part may fail, too many and you’ll spend hours cleaning up. Some slicers allow you to customize support density, tip diameter, and contact shape-experiment until you find the sweet spot for your chosen resin.
With the sliced file ready, pour the resin through a fine mesh filter into the vat. Filtering removes dust or cured particles that could mar your print. Insert the vat and secure the build platform. Initiate the printing process and monitor the first layers closely. Modern printers often include a small camera or transparent cover so you can watch initial adhesion without opening the lid. If the print lifts or shifts, cancel the job, re-level, and inspect the vat film for debris. Once the first few layers are successfully cured, the process continues layer by layer-typically taking anywhere from one to six hours depending on part size and layer thickness.
Printing is only half the journey; post-processing transforms your raw output into finished parts. When printing completes, remove the platform and gently scrape the model off. Use nitrile gloves to avoid skin contact with uncured resin. Rinse parts in isopropyl alcohol (IPA) or a commercially available wash solution. A rinse station or ultrasonic cleaner speeds this step, removing sticky resin residue. After washing, allow parts to air-dry or gently blow-dry with compressed air to eliminate moisture in crevices.
The next stage is post-curing, where UV light further solidifies the resin, improving mechanical properties and stabilizing colors. A dedicated curing chamber with controlled light intensity and temperature produces consistent results. Rotate parts periodically if your chamber doesn’t provide 360-degree exposure. Curing times vary-typically five to twenty minutes-based on resin formulation and part thickness. Proper curing reduces internal stresses and prevents parts from becoming tacky over time.
Support removal can be the most delicate phase, especially for high-detail models. Use precision flush cutters to snip away bulk supports, then fine needle files and sanding sticks to smooth contact points. For smooth surfaces, start with a low-grit sandpaper (around 200 grit), progressing to higher grits (up to 600 or 800) for a polished finish. If your design requires a glossy finish, wet-sanding at higher grits followed by a minimal resin brush-on coat and a quick UV cure can produce a glass-like surface.
Throughout this process, keeping your workspace organized and properly ventilated ensures safety and repeatable results. Equip your bench with sealed waste containers for used resin and alcohol, and dispose of them according to local regulations. A dedicated glove and apron system prevents resin contact with your clothes and skin. Proper lighting, magnification tools, and a tidy tool tray will make support cleanup and inspection far easier, reducing the chance of damage to fragile features.
By integrating these components-high-quality resins, a well-maintained vat, precise leveling tools, effective wash and cure stations, and fine finishing implements-you turn a desk-bound printer into a mini-production studio. You’ll gain the freedom to iterate designs quickly, validate fit and function before committing to more expensive manufacturing, and even produce small batches of end-use parts. Whether you’re a hobbyist exploring creative models or a startup engineering functional prototypes, SLA desktop printing delivers both precision and versatility.
Ready to take the plunge into resin-based additive manufacturing? Start with a straightforward design-perhaps a small gear assembly or a decorative figurine-and apply each step outlined here. Note how different resins behave, how your chosen support style affects surface quality, and how post-processing techniques shape the final result. Over time, you’ll refine your workflows, calibrate exposure settings for each resin brand, and discover new material formulations to suit every project. Embrace the hands-on learning curve and you’ll find that mastering SLA printing rewards you with unparalleled detail, consistent performance, and a powerful toolset for turning imagination into reality.












