Location
Mount Vernon, WA 98274

Location
Mount Vernon, WA 98274
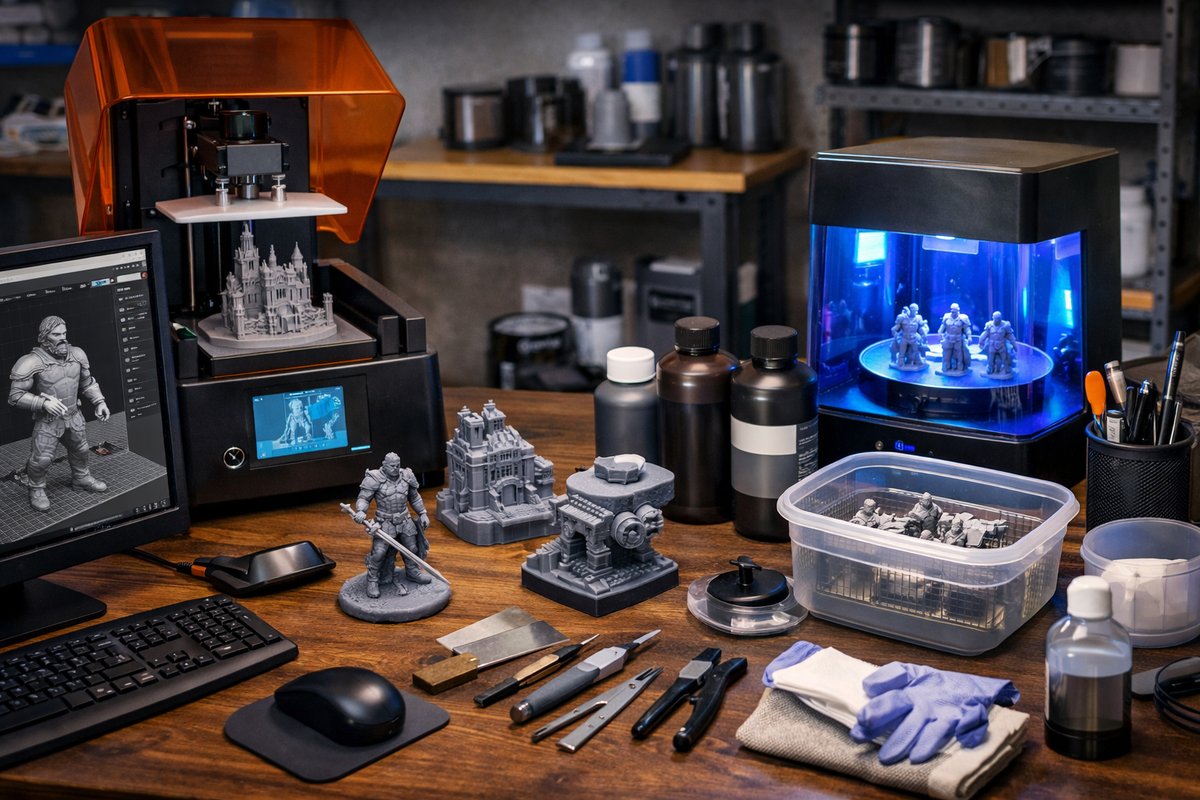
Explore the world of masked stereolithography (MSLA) resin printing, where high resolution meets tabletop convenience. This detailed how-to article walks you through each stage-from digital design and printer setup to post-processing-while highlighting essential tools and materials to achieve crisp, professional-quality parts.
Masked stereolithography (MSLA) introduces a desktop-friendly approach to resin additive manufacturing. Unlike filament-based methods, SLA cures liquid photopolymer layer by layer with UV light, delivering exceptional surface finish and fine feature detail. This guide demystifies the entire workflow for hobbyists, modelers, and design enthusiasts ready to explore intricate prototypes, dental models, jewelry masters, or miniature terrain pieces.
Start with a Solid 3D Model and Slicing Strategy
Every great print begins in CAD. When designing for MSLA, keep wall thickness in mind: aim for a minimum of 0.8-1.0 mm to ensure structural integrity and ease of support removal. Fine details below 0.5 mm may not resolve reliably. Export your part as an STL or OBJ file, then import it into slicing software compatible with your printer’s firmware. Popular slicers let you control layer height, exposure times, lift speeds, and support placement.
For ultra-fine detail, choose layer heights between 25 and 50 microns. Thinner layers improve resolution but increase print time. Leverage automatic support generation, then manually adjust support density under small overhangs or inside recesses. Position the model to minimize unsupported spans and reduce the risk of print failure. Export a properly configured print file-often a .PWA or .PHZ package-to your printer’s SD card or USB drive.
Essential Equipment and Consumables
A reliable desktop MSLA printer forms the heart of the system. Look for a machine featuring a high-resolution LCD panel (at least 4K for a 5- to 6-inch build area) and a robust Z-axis rail. The resin vat should include a replaceable FEP film to maintain optical clarity.
Photopolymer resin comes in a palette of clear, grey, black, or specialty engineering formulations. Standard grey resin balances ease of use with good mechanical properties. Specialty resins-rubber-like, dental, or castable-can open new creative avenues but often require optimized exposure settings.
Beyond the printer and resin, invest in post-processing gear: a wash station to remove uncured resin (typically using isopropyl alcohol around 90-99%), and a UV curing chamber or handheld lamp. Wear nitrile gloves, protective eyewear, and respiratory protection when handling uncured resin and alcohol. A precision digital caliper helps verify dimensional accuracy and calibrate your prints.
Printer Setup and Calibration
Position your printer on a stable, level surface with adequate ventilation. Remove any protective films from the build plate and vat. Fill the vat with resin up to the fill line, taking care not to introduce bubbles. Gently level the build plate according to the manufacturer’s instructions-often by loosening plate screws, homing the Z-axis to zero, then securing the plate.
Run a small test print, such as a calibration cube or corner test model. Check for adhesion on the first few layers: if the part detaches prematurely, increase bottom exposure time or adjust Z-axis offset in small increments (0.05 mm). Observe the cured layers for uniformity; warped or incomplete layers may signal a need to clean and retighten the FEP film or recalibrate the Z-axis lead screw.
Printing Your First Complex Part
With your test print successful, load a more intricate design-perhaps a detailed figurine or a mechanical housing. Start with moderate layer thickness (50 microns) and mid-range exposure times (8-10 seconds for normal layers, 30-40 seconds for bottom layers). Monitor the first few minutes to ensure layers peel cleanly from the FEP film.
Be patient. A 100-gram build can take several hours depending on layer height and raft thickness. Avoid interrupting the curing cycle; power fluctuations or accidental pauses can lead to layer shifts or incomplete cures. If you must pause, lock the build plate in place and resume within a few minutes.
Post-Processing: Cleansing and Curing
Once printing completes, wear gloves and carefully remove the build plate. Let excess resin drip back into the vat, then detach your part using a plastic scraper. Submerge the part in a wash station filled with isopropyl alcohol. For best results, run two sequential rinses-first to remove the bulk of uncured resin, then a briefer second wash for a final cleanse.
After washing, use compressed air or a lint-free brush to clear remaining droplets. Place the part on a rotating stand inside a UV curing chamber. Typical cure cycles range from 5 to 15 minutes, depending on resin color and thickness. Rotate the stand periodically if your chamber lacks dual-lamp coverage to ensure uniform hardening.
Once cured, support structures can be clipped away. Sand the contact points with fine-grit sandpaper (400-600 grit), then polish if needed. For a smooth, glossy finish, apply a thin coat of clear resin and cure again. Painting and surface treatments, including primers and acrylics, adhere beautifully to properly cured parts.
Troubleshooting and Optimization
If fine features fail to print, try increasing exposure time in 1-2-second increments or orienting the part at a diagonal to distribute layer peeling forces. For layer delamination, verify that the LCD mask is intact and free of cured resin drips beneath the FEP film. Uneven layer surfaces often stem from mechanical wobble-tighten Z-axis couplings and ensure the lead screw is lubricated.
Stringing or webbing between supports can be reduced by lowering the lift speed during layer transition. Resins prone to brittleness may benefit from tempering at room temperature for 24 hours after curing. And always discard contaminated resin: cloudy or gel-like resin indicates moisture intrusion or cured particles in the vat.
Scaling Up: Beyond the Basics
As you gain confidence, explore specialty resins that mimic engineering plastics or flexible elastomers. Experiment with dual-resin printing workflows or multi-material casting masters. Combine SLA parts with FDM-printed supports for hybrid assemblies. Advanced users might calibrate custom exposure curves or modify their printer with upgraded linear rails and alternative light sources.
Sustainability and Safety Considerations
Resin printing carries environmental concerns if uncured resin or solvent is disposed of improperly. Always filter and store spent resin in sealed containers and take waste solvent to a hazardous waste facility. Recycle plastic supports and degraded FEP films whenever possible. Maintain good airflow or an activated carbon filter on your printer to capture VOCs.
Final Thoughts
Desktop SLA resin printing unlocks unprecedented detail at an accessible price point. By mastering design guidelines, calibration routines, and post-processing workflows, you can produce parts once relegated to industrial labs. Whether you’re crafting detailed miniatures, functional prototypes, or precision molds, this versatile technique invites experimentation and rapid iteration. Gather your tools, stock up on resin and alcohol, and dive into your first resin-printed masterpiece.












