Location
Mount Vernon, WA 98274

Location
Mount Vernon, WA 98274
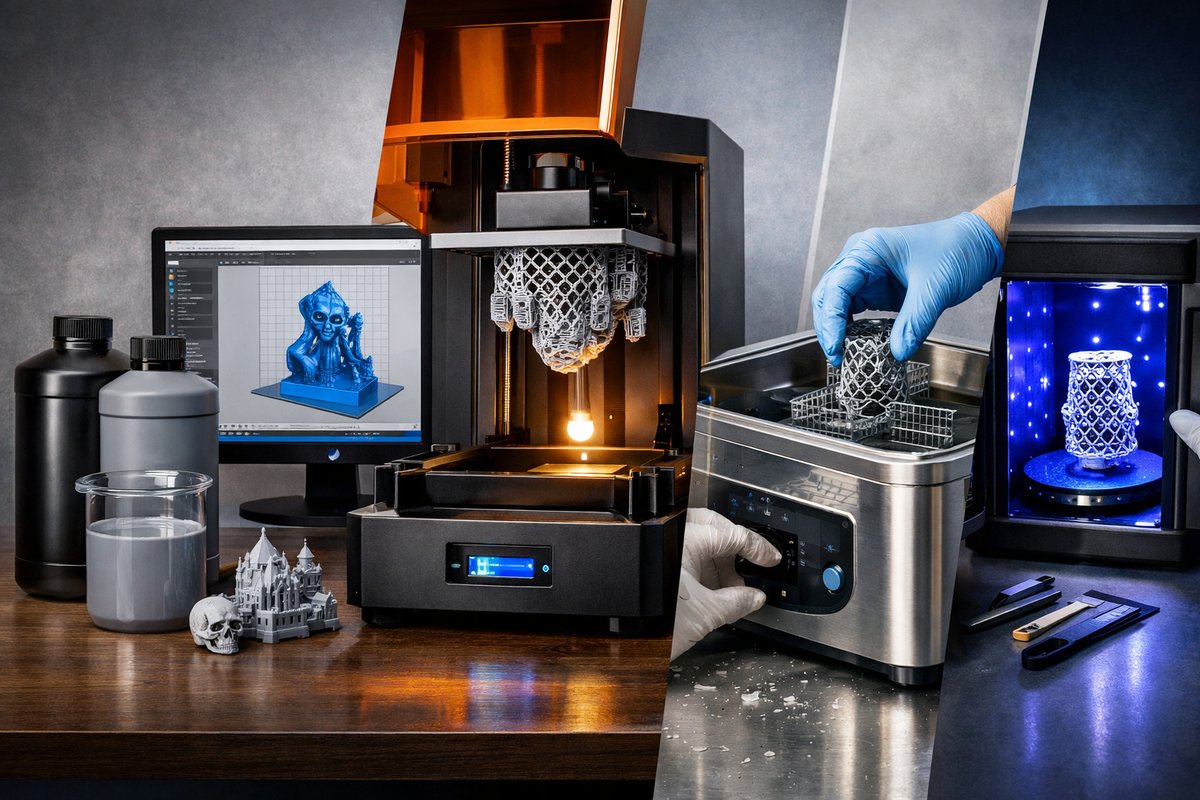
Discover the step-by-step process of digital light processing (DLP) resin 3D printing, from choosing the right photopolymer resin to post-processing a crisp, high-resolution prototype. This guide breaks down each stage-hardware setup, slicing, printing, washing, and curing-so you can confidently bring digital designs into the real world.
Additive manufacturing continues to reshape how we turn digital visions into physical reality. Within this ecosystem, resin-based approaches have opened doors to fine details, smooth surfaces, and versatile material properties that once felt out of reach. Among these, digital light processing (DLP) stands out for combining rapid layer curing with exceptional resolution. If you’ve ever admired intricate miniatures, precise dental models, or complex functional parts, you’ve seen the power of light-based additive methods at work. In this guide, you’ll find everything needed to set up, operate, and refine a DLP resin 3D printer to consistently achieve professional-quality results.
At the heart of DLP printing lies a projector or array of LEDs beneath a vat of liquid photopolymer resin. Unlike SLA, which uses a focused laser beam to trace each layer, DLP flashes an entire layer pattern at once, locking in details in mere seconds. This approach not only reduces print times but also yields uniform exposure across the build area. As each layer cures and solidifies, the build platform lifts, allowing fresh resin to flow beneath, ready for the next flash of light. Over dozens or hundreds of cycles, a three-dimensional object emerges, layer by layer, from the liquid surface.
One of DLP’s most alluring advantages is its resolution. Because each pixel in the projected image corresponds to a tiny voxel in resin, features as small as a few tens of microns become possible. That makes it ideal for precise prototypes, microfluidic channels, jewelry patterns, and dental or medical models. Layer uniformity also tends to be excellent, since the entire layer cures in one go. Compare that to filament processes, where molten plastic can shift or warp, and you’ll see why resin printing often wins on accuracy, though it may require more attention to post-processing and safety.
Getting started requires a handful of key components. First, the DLP resin printer itself-look for one with a reliable light source, a USB or network interface, and a sturdy build platform. Next, choose a compatible photopolymer resin. Manufacturers offer formulas tailored for toughness, flexibility, high temperature resistance, or even castable patterns for investment casting. A robust vat with a durable FEP or silicone release film keeps each cured layer from sticking too hard, ensuring smooth peel away. Finally, plan for post-processing: at minimum, you’ll need a wash station filled with isopropyl alcohol and a UV curing chamber or flood lamp to finish the polymerization process.
Not all resins are created equal. Standard resins aim for crisp details and glossy finishes but can be brittle. Tough resins add impact resistance at the expense of slightly lower resolution. Flexible or rubber-like resins bend under load, making them ideal for seals, gaskets, or grips. Specialty castable resins burn out cleanly, leaving no ash for lost-wax molds. When selecting a resin, consider the end use: prototypes and display pieces often do well with standard resin; functional parts may call for reinforced or high-temperature grades. Be mindful of the resin’s shelf life and storage requirements-many must remain in a cool, dark place to avoid premature curing.
Before pressing print, prepare your digital model in slicing software. Import the design file-typically STL or OBJ-and orient it to minimize unsupported surfaces. Angling parts 10 to 30 degrees helps distribute overhangs and reduces stress on peeling. Generate support structures where needed, focusing on contact points that won’t mar visible surfaces. Adjust layer thickness, exposure time, and lift speeds based on resin recommendations: thinner layers yield finer detail, while thicker layers cure faster but may sacrifice smoothness. Many software packages include presets for common resins, but fine-tuning often leads to the best balance of detail and print time.
Leveling the build platform comes next. Start with the printer’s procedure-most use a test exposure on the film or a piece of masking tape to set the gap between build plate and film. Ensure the platform is clean, free from cured resin residue, and securely tightened. Pour your chosen resin into the vat, filling to the recommended line. Keep the vat on a stable surface to avoid wobble or vibration, which can blur layers. Once the build platform is aligned and resin is in place, you’re ready to slice and send the file to the printer.
As printing begins, you’ll hear a gentle click or whir from the projector and see the first layer flash into existence. Monitor the first few layers closely, ensuring proper adhesion and watching for any bubbles trapped under the model. If you spot gaps or failed layers, you may need to re-level the platform or purge trapped gas by gently tapping the vat. During longer prints, occasional checks can catch issues early, saving hours of material and energy. Many printers also allow you to pause the job, retrieve partially printed parts for inspection, and resume once adjustments are made.
Once the job completes, the model still holds uncured resin on its surface and inside microscopic cavities. Transfer it into a wash station filled with 90%-99% isopropyl alcohol. Agitate gently or run a dedicated wash cycle if your station supports it. Two to three minutes often suffices to remove surface residue. For deeper crevices, a soft brush helps coax resin out of tight spots. After washing, let the part dry fully before the next stage-any lingering alcohol will interfere with final curing.
Curing is the final chemical step. Expose the washed print to UV light in a curing chamber or under a flood lamp, turning it periodically for even hardening. Most standard resins require two to five minutes per side, while specialty materials may need ten or more. This step locks in mechanical properties and ensures the resin reaches its rated strength, temperature resistance, or flexibility. Take care not to over-cure, which can cause discoloration or surface cracks. If your part still feels tacky after the recommended time, extend exposure in short intervals until fully solid to the touch.
With the print fully cured, remove support structures using flush cutters and fine pliers. Work slowly to minimize stress on delicate features. For visible surfaces, gently sand remaining nubs with fine-grit paper or abrasive sticks. A small dot of resin or two-part epoxy can fill gaps left by supports. If you plan to paint the model, apply a primer suitable for plastic surfaces. Choose acrylic or enamel paints for adhesion and finish. Once painted, a clear coat protects the surface from UV degradation and handling wear.
Even the best-laid prints sometimes exhibit layer lines, warping, or adhesion failures. Common troubleshooting steps include adjusting exposure times, slowing lift speeds to reduce suction forces, and verifying FEP film tightness. Resin contamination-dust, cured flakes, or pigment particles-shows up as speckles or rough patches. Filter your resin through a fine mesh or nylon sock before each pour. Keep the vat covered when not in use to avoid airborne debris or accidental exposure to light.
Working with photopolymer resin demands respect for safety. Always wear nitrile gloves and safety glasses during pouring, cleaning, and curing. Maintain good ventilation or use an air purifier to capture volatile organic compounds. Avoid direct skin contact and clean spills immediately with paper towels and isopropyl alcohol. Dispose of used resin and cleaning fluids according to local hazardous waste regulations. A respirator mask with organic vapor cartridges is recommended if you’ll be printing frequently or in a confined space.
Routine maintenance keeps a DLP resin printer operating smoothly. After each print, drain excess resin back into its bottle through a filter. Inspect the FEP film for cloudiness or scratching; replace it at the first sign of damage to maintain layer clarity. Wipe down the build platform and resin vat with alcohol, removing cured bits. Inspect cables, connectors, and seals periodically for wear. Updating firmware and slicing software can introduce new features or improved compatibility with emerging resin formulations.
DLP resin printing offers a fascinating window into high-resolution additive manufacturing. Once you master the interplay of design orientation, light exposure, and post-processing, you’ll unlock possibilities ranging from artful miniatures to functional engineering prototypes. Experiment with different resins to discover the balance of toughness, flexibility, or heat resistance you need. Share your successes and challenges within online communities to learn tips and tricks from fellow makers. More than a hobby, it’s a path into precision fabrication and creative expression.
Whether you’re a curious newcomer or an experienced 3D printing enthusiast, diving into DLP resin printing promises rewarding results. By following this guide’s detailed steps-from hardware selection to final curing-you’ll develop the confidence to take on ever more intricate designs. Soon enough, you’ll be pushing the boundaries of what light and liquid can build. Ready your next digital file, gather the right tools, and let each cured layer illuminate the path from concept to creation.












